Tuesday, June 21, 2016
Fire Sleeve for Fuel and Oil Hoses
With a wooden airplane it seems a good plan to protect it from an engine fire. One of the things new since we built the plane is Fire Sleeve to cover the fuel and oil hoses. I don't think it give complete fire protection for the hoses but it certainly will give you a few more minutes to get on the ground and out of the plane. It's a fiberglass tube covered with high temperature silicone rubber. You need to seal the ends to keep fuel and oil out so you don't have a fire inside the sleeve. They make a silicone rubber dip for this which is very expensive, more later.
To hold the sleeve tightly to the hose fitting you use these 1/4" wide stainless steel Band-It straps. They are a double coil with a clip to hold the coil together.
You need a tool to pull them tight. The end of the tool sets against the clip and you wind the free end like opening a spam can with it's key. The genuine Band-It tool is about $140 but they make a cheap tool for installing these same type clamps on CV Joint Boots for front wheel drive cars. I found the OTC 4623 CV Joint Tool on line for $14 with free shipping. I only had 6 clamps to install so it worked well.
On the OTC tool (red) the lever with a bend at the end operates the cutter and the other lever winds the free end of the strap.
You position the clamp over the hose end fitting, or in this case over the firewall tube I made. You want the hose protected. Slide the clamp free end into the tool so it goes through the cut off blade, behind the tip. The free end is just long enough to catch the slit in the winder. As a result you need to hold the tool tight to the clip so you can get the tip to make a nice 90 degree bend as you start winding. Once you get the wind to 90 degrees the free end is held very well in the winder. I found a 1/2" socket with a ratchet worked better than the winder handle. You just wind it tight, then lift the cut off lever to cut off the free end. The remains of the free end just slides off the winder by pulling the winder out of the tool.
The cut off leaves about 1/2" of the free end with a sharp end. You could just fold it over the clip. Just like with the end of safety wire I put a little fold at the end, to hide the sharp end, before folding it over the clip. You can see it if you look close at he clamp on the gascolator end of the sleeve.
If you use the Firesleeve End Dip sealer for the ends of the sleeve you need to dip it about 1" into the sealer so the sealer goes past where the clamp is installed to keep any fuel or oil from wicking up the glass fibers. A pint of the End Dip sells for $120 - $145 so it's not practical for a few sleeves. You're just trying to keep oils and fuels from contaminating the glass fibers. One cheaper solution is High Temp RTV. This one is for temperatures to 500 degrees. They make one which is is good to 700 degrees. I chose this one which is focused on Maximum Oil Resistance, since that is the goal. It's a little messy to use but it worked well at the firewall and at the end of the Oil Pressure hose.
Another solution is Self Sealing Electrical Tape. I bought this one at Lowes. One side has Mastic on it so it seals to the other side when you wrap it. The tapes is 1" wide and you need to pull it tight enough to stretch it so it's about 3/4" wide as you wrap. The, low pressure, fuel line has hose clamps so I located the band clamp next to the hose clamp and then wrapped the end onto the hose fitting to get a good seal. They also make this tape in a high temp silicone tape.
All the lines are sleeved and sealed. We're making progress.
Saturday, June 11, 2016
Engine's On The Fuselage
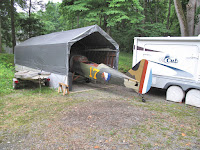
The tent is 10' x 30' but working space in the tent is crowded. By putting the Fly Baby in nose first and the Cessna 140 tail first both will fit. To get any work done the Cessna has to move out. At least I have room in the attic to start assembling the wings for the WACO NINE.
To make it easier to safety wire the turnbuckles, on the landing gear brace wires, I ran it up on the car ramps. It let me sit and work so I could see what I was doing. I think we're ready for the engine.
Dan came back and helped move the engine from the attic. The 2x4s I attached to the engine mount allowed us to use the stair rails to bear the weight carrying the engine down.
The first few feet were awkward because the 2x4s should have been a couple inches shorter at the bottom. When we had the engine far enough to the right to clear the deck railing it wanted to tip over the rail.
Once we got it on the rails where both ends of the 2x4s were supported it was just a matter of keeping it from sliding too fast, one person on top holding back and one on the bottom pushing up.
At the bottom we just lifted it by the boards and carried it to the tent. There we just dragged it on the bottom board to get it into position to hoist it.
We used the come-along to hoist it from a joint in the tent frame. I secured a heavy ratchet strap tight across the frame of the tent to keep the poles from spreading with the weight of the engine. Dan thought I was crazy until I did pull ups on the come-along to show him the tent could take it.
We lifted the tail on a saw horse to get the firewall aligned with the engine mount.
Then we just hoisted the engine high enough to slide it on the bolts. It went very well. Much better than doing it by myself in the attic.
Before removing the hoist the nuts were tightened on the bolts.
Hey we're outside and it's looking like an airplane again.
Lots of little things to hook up.
Saturday, June 4, 2016
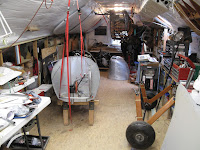
Fuselage is out of the Attic - After 10 Years
After taking off the cowling and horizontal tail surfaces the first big task was to remove the engine. I used the come-along on my slider tubes, from earlier, to hold it while removing the firewall bolts. I then bolted 2x4s to the back of the engine mount and slowly lowered the engine to a cart.
We've got to carry it down the steps so I added a stiffener to prevent accidentally bending the engine mount.
We'll carry it down after we rest up from moving the fuselage. All these things seemed much lighter 10 years ago when our son Wade and I carried them up the steps.
When we carried the fuselage up the firewall was not on and it was easy to hold the front of the fuselage. I made up some handles from 1" conduit to make it easier to lift the front end going down the steps.
The gear is off. It's setting on a small saw horse and suspended from the ceiling so we don't damage anything until we can move it.
After 3 weeks of rain we had an afternoon when my neighbor Dan was available to help move the fuselage. We slid it out onto the porch railing with some rugs to pad the railing
With the tail wheel on, the tail is the heavy end despite how much is hanging over the railing. Because I built the house with 10 foot ceilings on the first floor the deck railing is 15 feet above the ground. You just need faith it won't fall.
With the tail finally clear of the door we could slide it back. Then we had to slide the fuselage to the left to get it aligned with the stairs.
Once it was lined up we could lift the tail over the railing.
We slowly slid it to the edge of the railing so Dan could use the handles to lift the nose off the rail and start down the steps.
Dan really had the heavy awkward end coming down the steps and kept urging me to hurry. We just had to go slow and easy as we each moved down a step and made sure we had a good footing before taking the next step.
On the ground it was back onto the small saw horse while we positioned the gear under the fuselage.
Muscle man Dan Doing the lifting while Patricia and I put the gear bolts back in.
It's out of the attic and on the gear.
I think it's time to put this thing back together.
Subscribe to:
Comments (Atom)


