At the start of 1967 the Fly Baby had accumulated 6 hours 15 minutes. Neither Ernie nor Dennis had flown the plane yet. Ernie got his first flight on May 6.
In April we finished the repairs to a Taylorcraft L2-M, N47469, which Ernie bought for $125. We each got to fly it April 5th. It wasn't much of a performer but it flew and gave us some tail wheel practice before flying the Fly Baby. Dennis put 12 hours on the T-craft that year despite spending the summer working in the Upper Peninsula of Michigan.
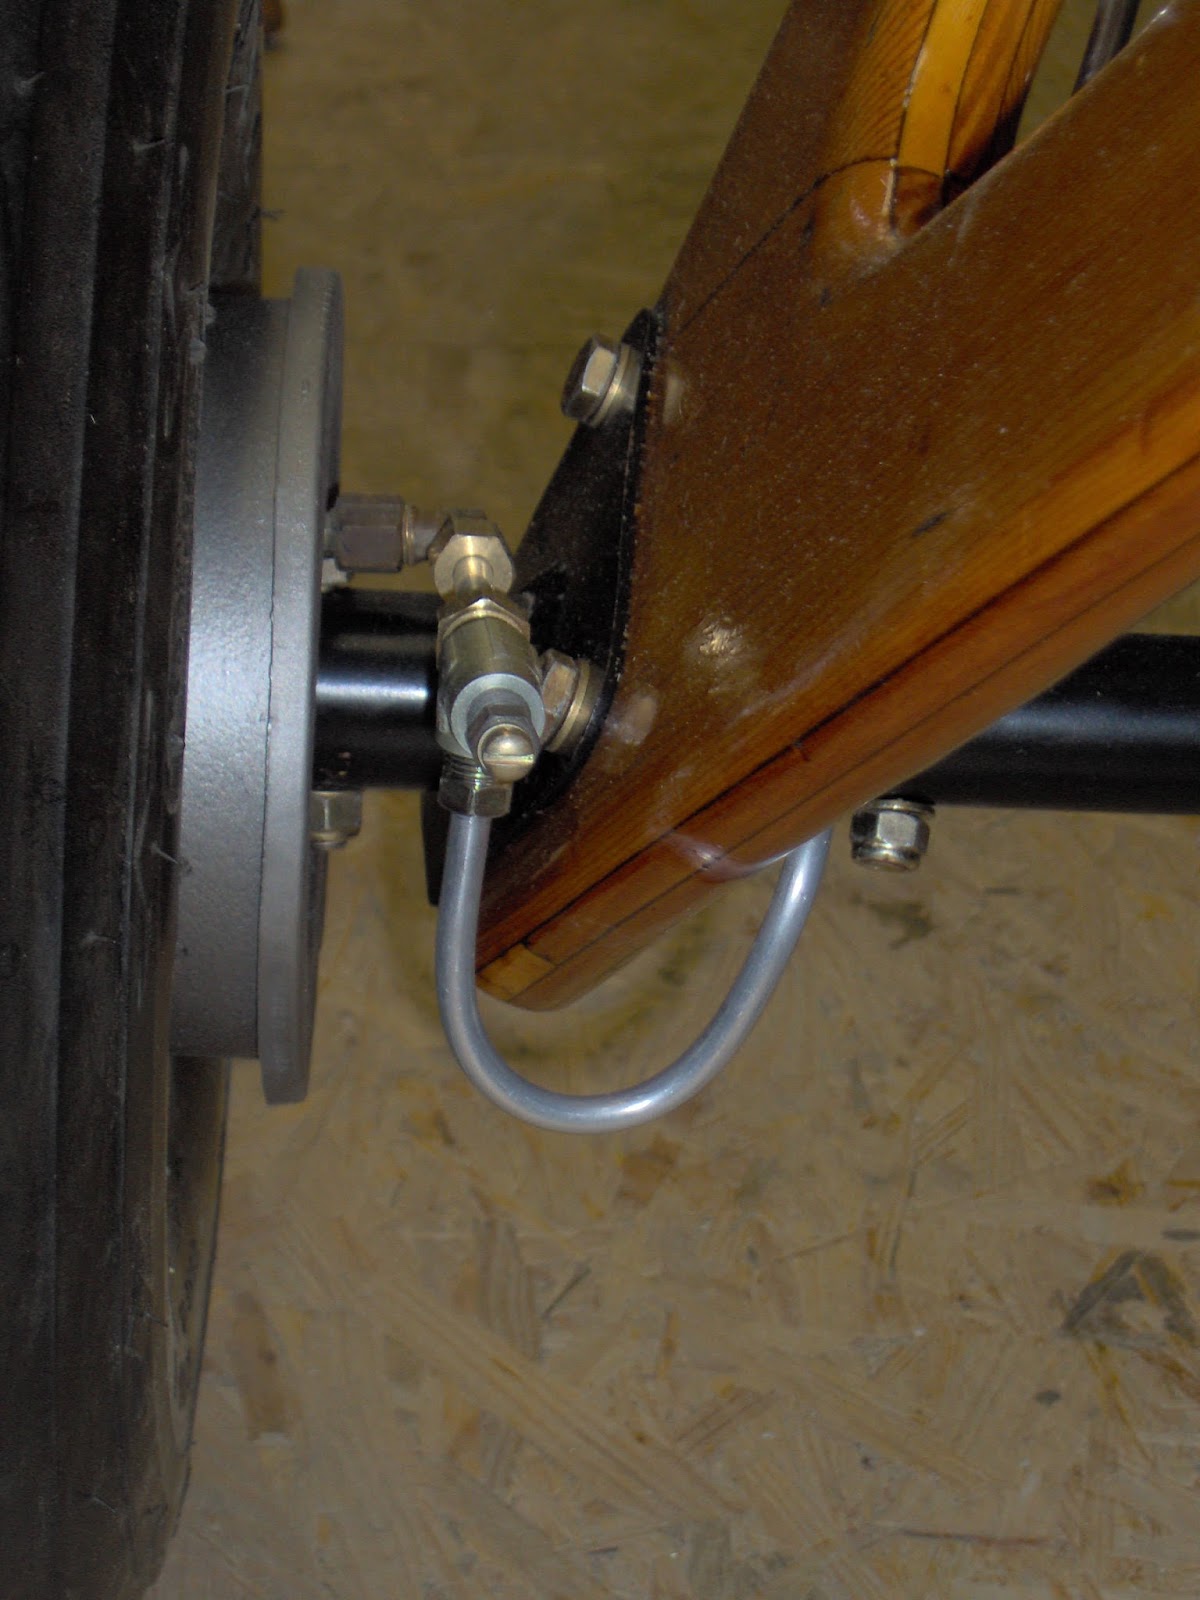
A hard landing in the Fly Baby pointed out a problem we had caused by using 700x6 wheels instead of the 800x4 wheels like Pete used. There is no shock absorption in the smaller, higher pressure 700x6 tires. As a result the axle bent.
Fortunately the wood gear legs are very strong and did not break.
Another factor which made it easier for the axle to bend was the position of the steel bar in the center of the axle. It provides an attachment for the wing flying wires. The drawing for it is not clear enough as to orientation. The bar should be nearly vertical so the load on each end of the shackle would be equal. The center line of the pin through the shackle should be about parallel to the bottom of the wing, which make the bare nearly vertical. With the bar vertical it helps stiffen the axle.
The lower image in Figure 2-5 make it look like the bar is parallel to the wing and the pin vertical. A side view of the bar and axle would have made this clearer.
A new gear was quickly built but it was much later that we found the bar was installed wrong. We were lucky the shackle didn't fail. We were able to leave the bar and make some plates to replace the shackle. The bar is still in the wrong position. If I get around to putting the Monoplane wings back on I'll replace the axle to turn the bar vertical.
The plane is back at Dalton airport near Flushing, Michigan for the annual Dawn Patrol with 800x4 wheels and tires.
We know who 2 of the 3 people looking at the plane are. The person facing the camera, wearing a ball cap, is Howard Nixon of Cheasining. Howard built a Smith Miniplane, N66N. The person with his back to the camera is Ray Shelby. Ray built a Baby Ace in a small cottage a few miles from Dalton.
Fly baby heading out for another flight.
On August 10th Ernie passed his Private Pilot check ride, Freedom At Last! Congratulations Dad!
In addition to Dwayne and Ray, 1967 saw several more Chapter 77 members get to fly the plane, Howard Nixon, Gordon Hale, Harley Fortier, Jim Burris, and Shel Williams all took a turn.
Back on the flight line at Dalton Airport.
I wonder if the the colors of the champ inspired my Dad to pick those colors for the Fly Baby, White with Light Blue trim and Red stripes. He doesn't think so but I'm sure the champ was at the airport before we painted the Fly Baby. I'd never thought about it until I recently saw this picture.
The year ended with 18 hours, 30 minutes flown toward the 40 hour restrictions and I had not yet flown the plane.