Thursday, July 30, 2020

Magnetos Repaired


 Without the manuals it's easy to mess up things you're working on.  I have both the service and parts manuals to help get things right.

I have a tube of magneto grease so while I had the mags off I repacked the bearings.  The grease in them was certainly over 40 years old.

 On my Cabin WACO the 240 HP Continental motor had a distributor ignition system on one side which was notorious for the point gap being wrong.  Shortly after acquiring the plane the points weren't opening on a couple cam lobes.  Rather than set them with a feeler gauge, which had been done every 50 hours since 1941, I made a fixture to hold my wife's dial indicator.  There were 7 lobes on the cam so it was easy with the dial indicator to adjust the points so all the lobes were close to spec.  It worked great and when I sold the plane 350 hours later the points were still working fine. 

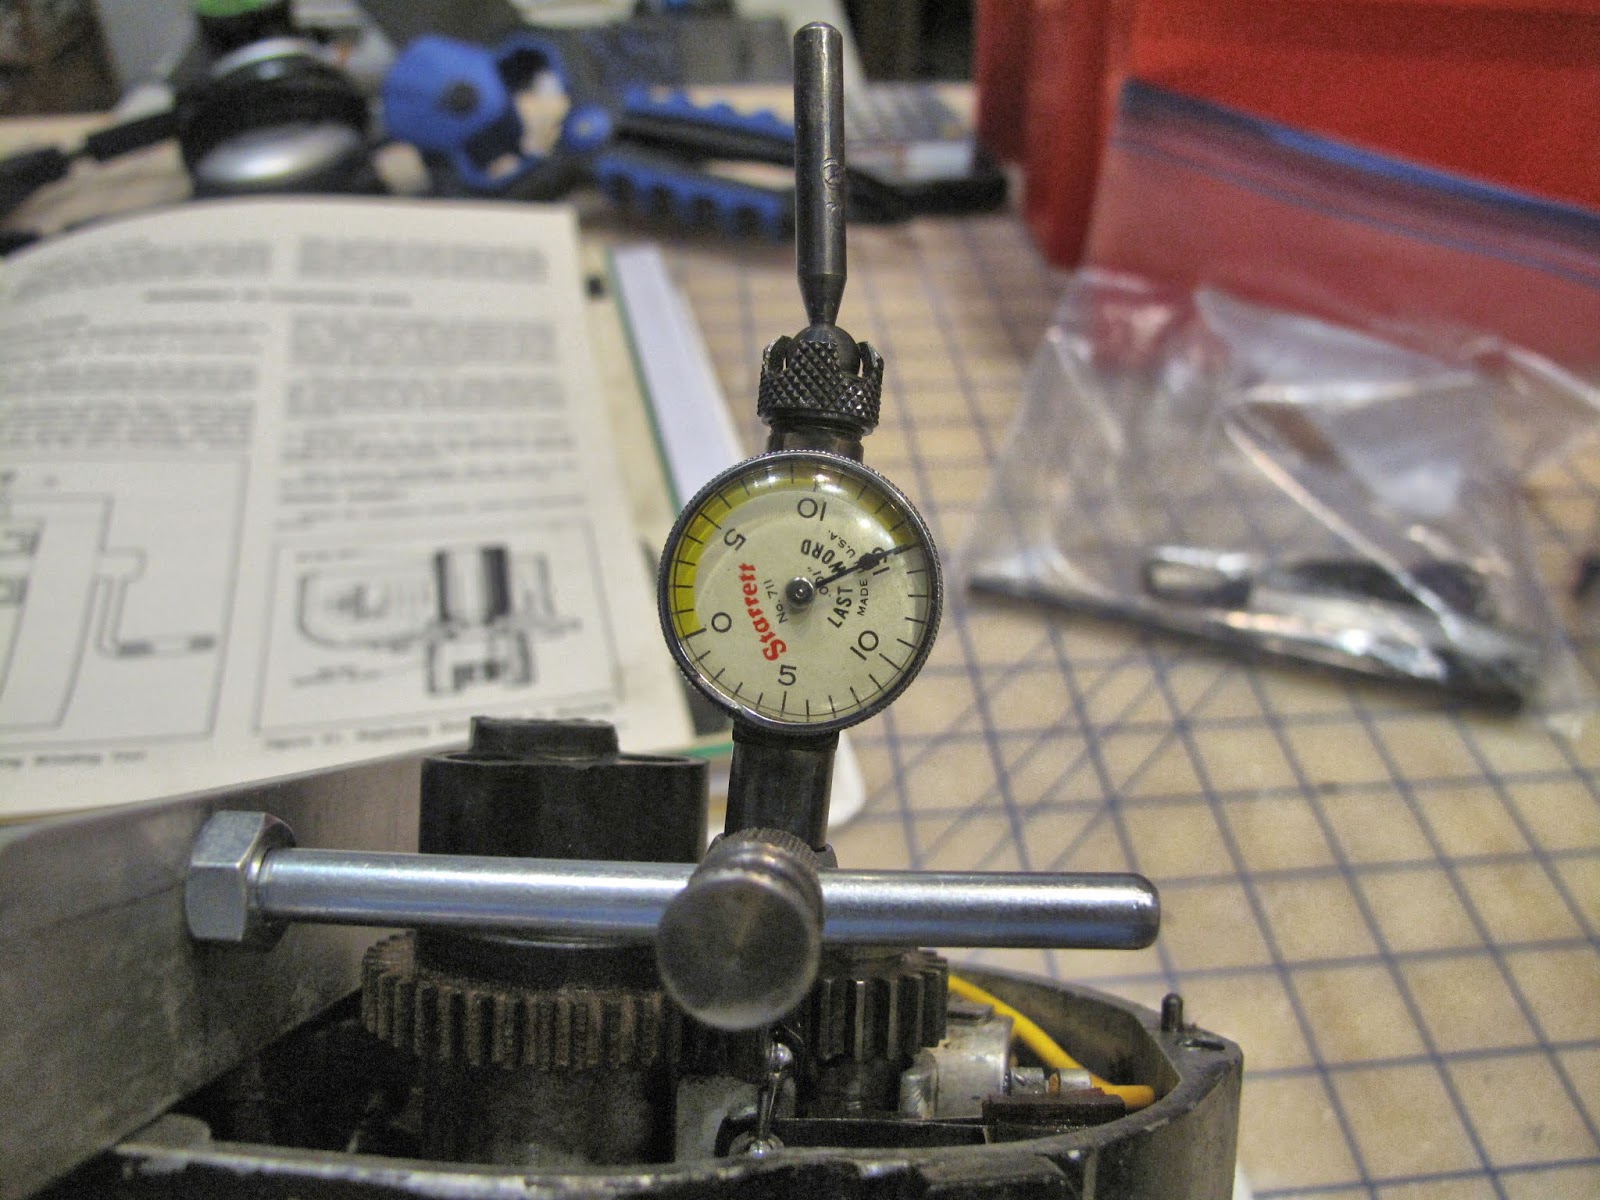
I used the same idea to mount the dial indicator on the Eisemann magneto housing.  The 2 screws pick up the cover mounting holes the little hole beside the one screw is clearance for the dowel pin.  The mounting rod for the indicator is a 1/4" bolt with the head cut off.


 The ball end of the indicator is riding on the center of the rivet end of the movable contact point.

 Just zero the indicator at the bottom of the cam and rotate the shaft to the high spot on the cam lobe.  The gap should be between 0.018" and 0.022", it was at 0.015".

 The 2 outer screws are the mounting screws, which must be loosened to adjust the gap.  The middle screw is a small, very sensitive, cam.  I don't know how you would ever get this right with feeler gauges.  The screw cam was incredibly sensitive.  After about a dozen tries I got there with both lobes right near the middle of the spec., same on the other mag.

 I also replaced the condenser in each mag with new ones from Fresno Air Parts.
 I had 2 other Eisemann LA-4 mags I hoped I could just install.  They worked great.  One small problem they had the wrong impulse on them.  They must be off an engine where the mags turn counter clockwise.  The coupling also wouldn't fit my gear.  Probably so you couldn't put them on the wrong engine.  The pin which operates the impulse is also on the wrong side to just swap the coupling.  Oh Well,  they provided parts and lots of learning.
 In order to grease the bearings you have to remove the gear which drives the rotor.  With the rotor in the cylinder 1 firing position there are timing marks on the gears.

 I needed some way to tell if the coil and points were working without installing all the covers and spark plug leads.  I clamped a little piece of copper so the spark could jump the gap, showing me it was working.  The originally dead mag would not do this at all.  The small gap worked with my mag without an impulse coupling.  With the impulse the mag would easily jump the big gap.

The mags are back together, working, and ready to reinstall on the motor.

Sunday, July 5, 2020

Magnetos Not Firing

It turns out there is no spark from either magneto even with the ground lead disconnected.  I'm not sure what has gone wrong since the last time the motor was run.  Looks like I need to do some research on my Eisemann LA-4 magnetos.  I do have the Bendix mags. for the C-140 project so they may be my short term solution. 

We'll see.

Saturday, July 4, 2020

Condition Inspection - Engine Test Run

 Yea!  I'm back working on getting ready to fly.  I safety wired spreader bars to the wing wires.
 Three small holes got poked in the fabric last year, hangar rash.  I patched them and painted on some German Crosses to represent bullet hole repairs.  Much easier than trying to get all the paint to match.

I completed the Annual Condition Inspection the other day them tied the plane down to run the motor.  No Luck!  I got very sweaty, 90 + outside, but never got a burp out of it.  I did manage to flood it, gas dripping from the carburetor.

I tried again this morning, only in the 80's, with no luck so I'll have to come back early in the morning to work on it.

I still need insurance and a state sticker but we're closer to flying.

Tuesday, June 30, 2020

Weight and Balance

I've been building wings for the WACO NINE project while waiting for weather and viruses to cooperate with getting Fly Baby Flying.

I tried borrowing scales to do the weight and balance but the nearest scales were over 60 miles away.  Instead I bought one scale, an ADAM CPWplus 200.  It's good for 200 kg or 440 lb.
 To make it work I made 3 blocks, the thickness of the scale (2 1/4"), one for each wheel.  For the mains I added chocks to the blocks so the plane wouldn't roll off.  I also made a stack of shims 1/4", 1/2" and 3/4" to use for leveling the plane.


A stool turned out to be the perfect height for the tail wheel, with a 1/2" shim.

Level fore and aft.


 I had to put 1/2" of shims under the left main to get it  zeroed left to right. If I had brought the small air compressor I could have adjusted tire pressure also.

 With the plane level I then proceeded to measuring where things were along the axis of the plane.


The tape measure is zeroed under the center of the tail wheel.

 To do that I hung a plumb bob at a convenient spot forward of the stool.  Then I measured from the center of the tail wheel to the plumb string, 13 5/8".

Then I just slid the end of the tape back to where the plumb bob was at 13 5/8", making zero directly under the tail wheel center.


 The plumb bob was used to locate the axle, 169 7/8".


Then the firewall, our datum point, 185 3/16".  That makes the mains 15 5/16" aft of the datum

 I would like to replace the prop one day with a wood prop so I located it also, 212 3/8" or 27 3/16" forward of the datum.
 While I was at it I decided to measure the length of the plane.  The tip of the spinner was at 217 12".


The trailing edge of the rudder was 18" behind the tail wheel making the plane 235 1/2" long, 19 feet 7 1/2".


 I then swapped the scale for the block at each wheel and took the empty weights.  I also cross checked it with a second scale since I couldn't find 400 pounds of calibrated weights.  I eventually checked it with a third scale also.

Multiple readings were taken with each scale at each wheel.


 Same process for the left main.


 Then again for the right main.  It was a little slow but worked fine.

 I then wanted to weigh the plane with me in it to determine my CG location.  The scale won't read past 440 Lbs. so I decided to weigh myself then get in the plane and photograph the tail weight with me in it.  The remaining part of my weight is on the mains.  In 1976 we had the pilot CG at 40", I came up with 39.85".  I'd say we had it right on back then.

I preceded to do the same weighing process, with the help of my neighbor George, as we add fuel and checked the weight at 5 gallons, 10 gallons and full at 14.7 gallons.  The CG of the Gas Tank came out where I measured it so it looks like we got it right.

The data agrees very well with the 1976 data.  You also would have to work at getting to the forward or aft CG limits.  We're closing in on Flying this Baby.

Sunday, January 19, 2020

Moved Lewis Gun Forward 3 inches


 While I've been waiting for better weather I fixed a problem I've had getting in and out of the cockpit.  I had remade the mount for the Lewis Gun to remove the clutter from the upper surface of the center section.  I thought it completely wiped out any lift in the center section, with all the tubes. 
Unfortunately I moved the gun back about 1 1/2" making it harder in my old age to get in and out of the cockpit.  I kept hitting my head on the gun. 
I remade the mounts to move the gun forward 3" and to shorten the rear handle about 1 1/2".  It's now very easy to get in and out.  You don't even notice the gun is there.


 I made longer rear mounting brackets to move the gun forward and still use the brackets in the center section.

 I moved the forward mount back along the barrel.  It made the clamp around the barrel a little more complicated but it works.  I had to re-bend the tall brackets slightly to make everything fit. 
I like the look better with more of the barrel sticking out past the mounting.

Sunday, January 5, 2020

New Hangar for Fly Baby


 I've move Fly Baby to the tee hangar next to where I started at Gordonsville airport 30 years ago.  I'm now in hangar 8.  Bill is at the end of the row with his Fly Baby.
Now I need to get flying.  I had my hip replaced in September so now I can operate the brakes.  My BFR, Medical, and insurance are up to date. Hopefully I'll be back flying the C172 this week. 

I still need to weigh the plane update the log books.