Tuesday, November 27, 2018
Fly Baby Trailer - Rebuild
Two years ago I brought home what was left of the trailer my Dad and his brother made for the Fly Baby in 1966. I also bought an old boat trailer to use for the steel to lengthen the trailer to again fit the Fly Baby. If I'm ever going to get the plane back to the airport I need to redo the trailer.
I started on the Fly Baby trailer by removing the plywood in the middle and cutting off the extension added to the front for the RC Model storage box. Dad could get about 6 large scale RC models in the box. We're talking planes with up to 10 ft wingspan.
I was able to prop it up with a saw horse to work underneath. There were the remains of some diagonal braces for the old long tongue, which had been cut short when the tongue was shortened. They needed to come off so I could weld the new steel under the angle iron on the sides of the trailer.
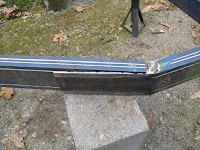
The tube one came off easy. I thought I had cut loose the angle iron piece when I discovered it was welded to the frame under the diamond plate. I was able to cut through the angle iron from below, right along the weld line, with the cutting attachment on my Dillon torch.
Next I removed all the boat related hardware from the boat trailer.
I cut off the fenders and the 2 rear Vee shaped braces. This is looking like it might work. The front Vee brace I cut loose enough to bend it up to make a flat brace. I'll weld it back together once the frame is built.
The axle was next to go and that front brace was shortened. This trailer frame is 67" wide and the Fly Baby frame is 60 1/2" wide, so the boat trailer needs to get narrower.
The idea was to cut off the side rails along the triangular front section at a point where I can weld them back on and they will be 60 1/2" wide. This point left about 10" forward of the bend on the side rails. Plenty to overlap them with the forward section and weld it all back together.
Lots of careful measuring before making the cuts.
I did a trial fit up to make sure I had done the cuts correctly.
To make the overlap I used the cutting attachment to remove the flanges in that area and then trim the remainder as close to flat as possible.
A little grinding with the disc sander and the overlap tab is ready. This could really work.
Another fit up to check we're still doing this correctly.
I realized that the Fly Baby trailer on the ramps was almost the same height as the boat trailer on blocks. This allowed me to use the Fly Baby trailer as a fixture to hold the rear ends of the side rails in the correct position. They'll need to get shortened about 30" once the front is all welded.
I clamped the rails to the trailer using the forward spring bracket as a stop on each side.
The overlap tab was clamped, drilled and bolted together with 1/2" bolts. This should give a little extra safety if my welds aren't perfect. The plan is to weld around the tab and weld the flanges together on the side rails, as it was done originally. It's really looking like a trailer.
Subscribe to:
Post Comments (Atom)


No comments:
Post a Comment