Sunday, November 20, 2016

Fabric on Both Upper Wing Panels

A week of warm afternoons has allowed me to get the fabric on both upper wing panels so they are ready for Rib Lacing (Stitching).  It turns out the old CAM 18 calls it Rib Lacing also.  I guess I need to quit calling it Rib Stitching.
 The first step was to install the Inter-Rib Bracing zig-zagged between the ribs.  The instructions say it should not be attached to the ribs so they can move with the fabric as it tightens.  I thought the whole point was to keep them from moving as the fabric is prepared for Rib Lacing.  In any case the solid ribs require nailing it to the rib cap strips so that's what I did.  I also used some Ploy-Tak at the ends and to keep it from sliding on the wing tip tube.
I had decided when I ordered the fabric to sew up envelopes for the wing panels. The fabric is 72" wide and it takes 90" of fabric to wrap around the ribs.  I could have cut 2 90" panels and sewn them together to make a blanket which would wrap and join at the trailing edge.  I find it hard to shrink the fabric so those seems are straight and on these wings with the ribs at 9 degrees off square it all seemed like a poor way to do it.  Instead I chose to have 2 Span-Wise seams, one at the trailing edge and one aft of the forward wing spar.  

I split a piece into 2 36" wide strips for the bottoms of the 2 wings.  With a table set up to hold the excess fabric I wrapped fabric starting 1" on the bottom of the trailing edge, around the leading edge and cut it off at the tip.  I left about 8" of excess at the root rib to completely cover it and about 3" excess at the tip.  I didn't trim off the excess on the wrapped piece until after the seam was sewn.


 I took the 2 pieces in the house rolled them up on some work tables and pinned the edges together.

I like large #28 T-pins for this type work.  Much easier to work with.  As long as the pins are perpendicular to the stitch line you can usually sew right over them and remove them after sewing.  You can also stop, with the sewing machine needle down, and remove each pin as you get to it.


 The rolled pieces of fabric are easy to feed through the machine.  You can do this on the floor as long as it's clean.  I have these tables and find standing easier.  This is how they sew sails for a boat or Hang Glider.

All this was a good plan but I didn't pay close attention to what I was doing and sewed the wrong edges together.  I had to remove the seam and start over.  This time I pinned it on the wing.  I decided to just pin the whole thing and sew it all at once instead of each straight seem and then the tip.  Bad plan we'll do it right on the next wing.

 I was on a roll of bad decisions.  I started pinning the tip and realized I had started pinning the bottom over the top at the rear and the top over the bottom at the front.

I got it all sorted out and the tip nicely pinned.  You don't want any of this done so that the fabric is pulled tight.  The fabric will shrink up to 10%.  More like a comfortable Hawaiian shirt, not like a skin tight tee shirt.

 I sewed the seams starting in at the tip and working out.  I find it easier to position all the fabric this way and so as you're sewing you have less of a mess in the throat of the machine.

It came out fine but sewing each straight seam first would have been easier.
 We had sewn envelopes for the Stinson L-5a, which I fixed up as my practical exam for my A&P certificate, and find installing them so much easier.  I really was determined to learn how to make envelopes.

For the Right Hand panel I again set up a table for the excess fabric and cut my wrap piece.  I already had the other half of the piece for the bottom.


 I like these little wire spring (potato chip bag) clips for the trailing edge.  Because of how they pivot they fit perfect and the rubberized coating keeps them from sliding off.

I clipped the trailing edge of the wrap piece with a 1" overlap on the bottom of the trailing edge.  I then clipped the bottom piece in position over it and pinned them together.

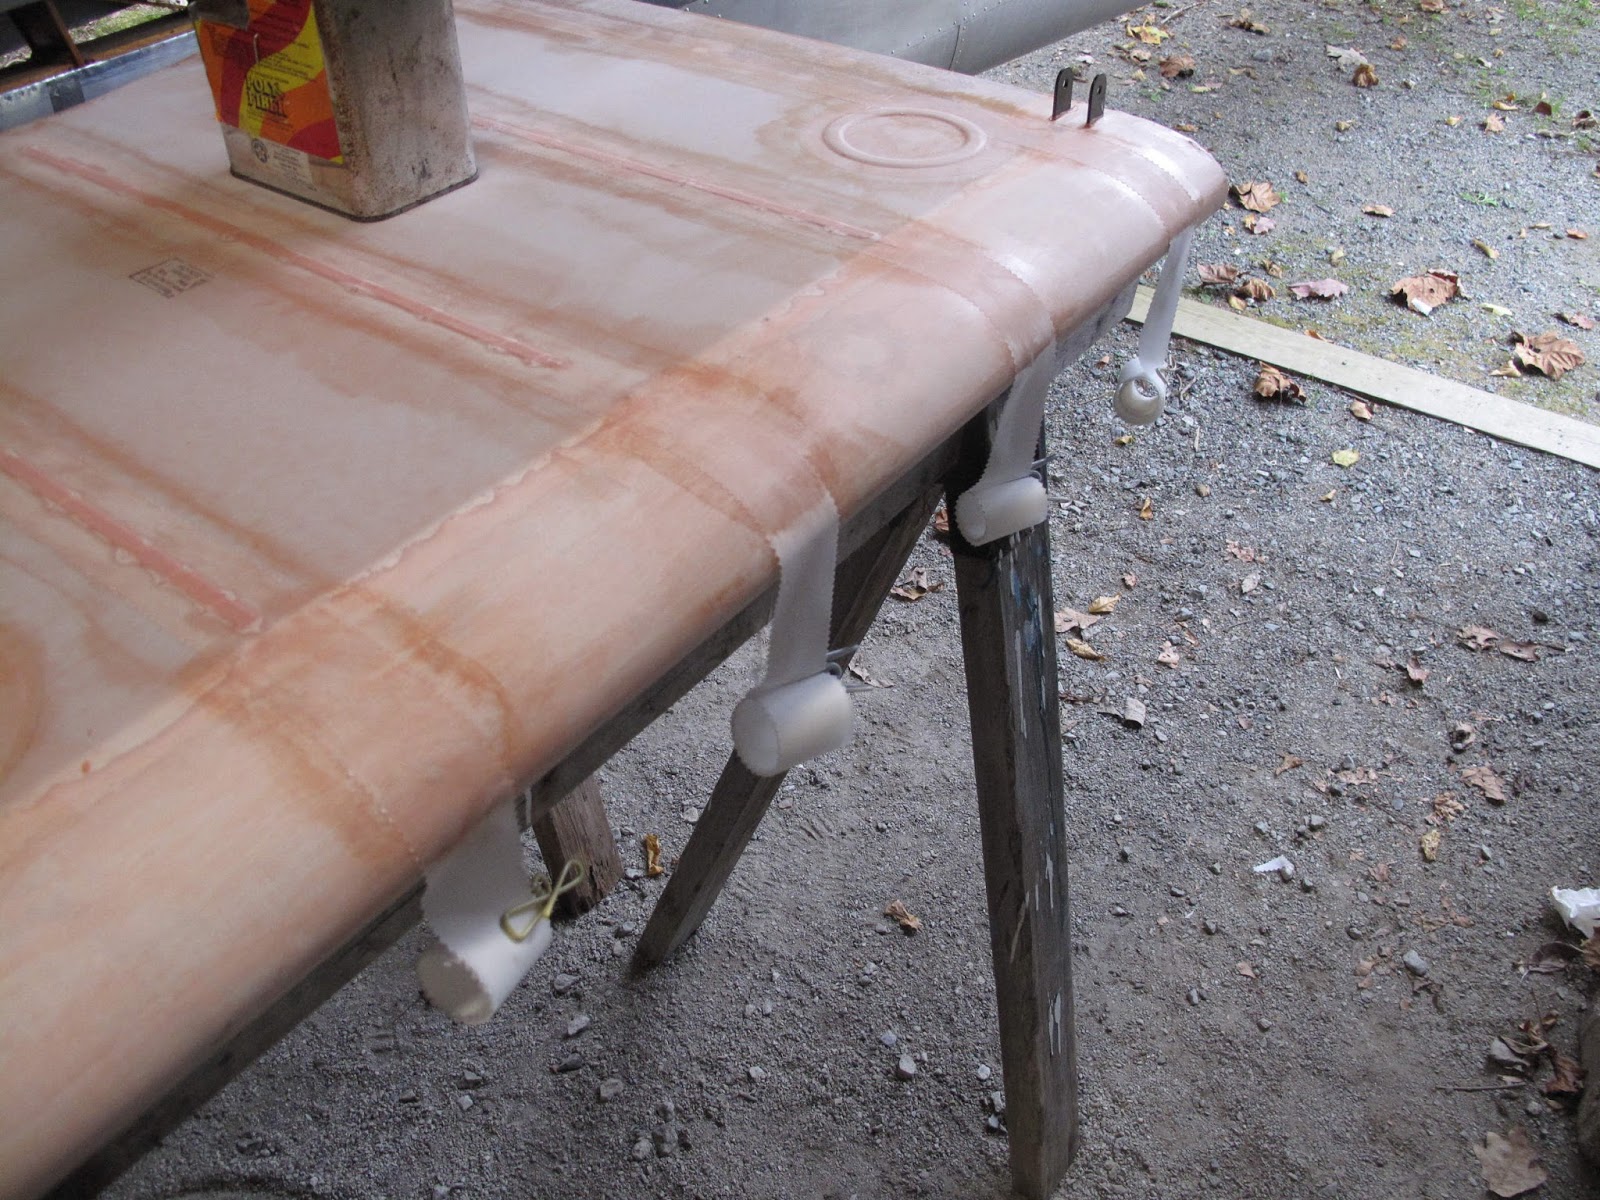
I used the wing as a convenient table to roll up the 2 pieces as before with a few clips to keep them from unrolling.  The wrinkles the clips create in the fabric will get ironed out when we shrink it later.


 Back to the tables and the sewing machine.  I'm just using a flat seem.  The 2 rows of stitching need to be 3/8" apart and 1/16" from a straight edge or the bottom of the pinked edge.  Pinked edges can still unravel so I prefer to stay 1/8" instead.

 With the trailing edge seam clipped back in position the forward seam can be pinned and sewn.  I still started sewing this seam so that when I got to the end there was no fabric left in the throat of the machine.


 Back on the wing, the root end was clamped to hold it from sliding.  The tip was pined and then sewn.  Despite taking the fabric on and off twice this was much easier than pinning up a complete bag.


 The leading edge and root box got 2 coats of Poly-Brush to prevent pinholes forming when finishing the fabric.
 By using an envelope the only gluing is at the root rib.  You could hand sew it with a baseball stitch if you wanted like they did with cotton and linen.

The bottom is pulled up and glued at the top 1"+.  It had to be heat formed at the nose to fit the curve.

I cut about 2" at the very nose which I heat formed pulling it aft.  Then the upper fabric was heat formed pulling it down.  I cut off the upper fabric leaving about 2", so I'd have a little more than the 1" minimum required glued seam.


 The fabric was shrunk in 2 steps with the iron at 250 degrees and 350 degrees.  I like to take time with the  250 degree shrink to get it all snugged nice especially on areas which suck up the heat like the aluminum leading edges.

The first coat of Poly-Brush is on.  You need to get plenty worked through the fabric so it is well encapsulated by the Poly-Brush.  Runs are OK just no puddles and as a minimum you want nice droplets like big measles.  If you had these runs in dope it would show because of how the dope tightens over time.  Poly-Brush does not tighten.
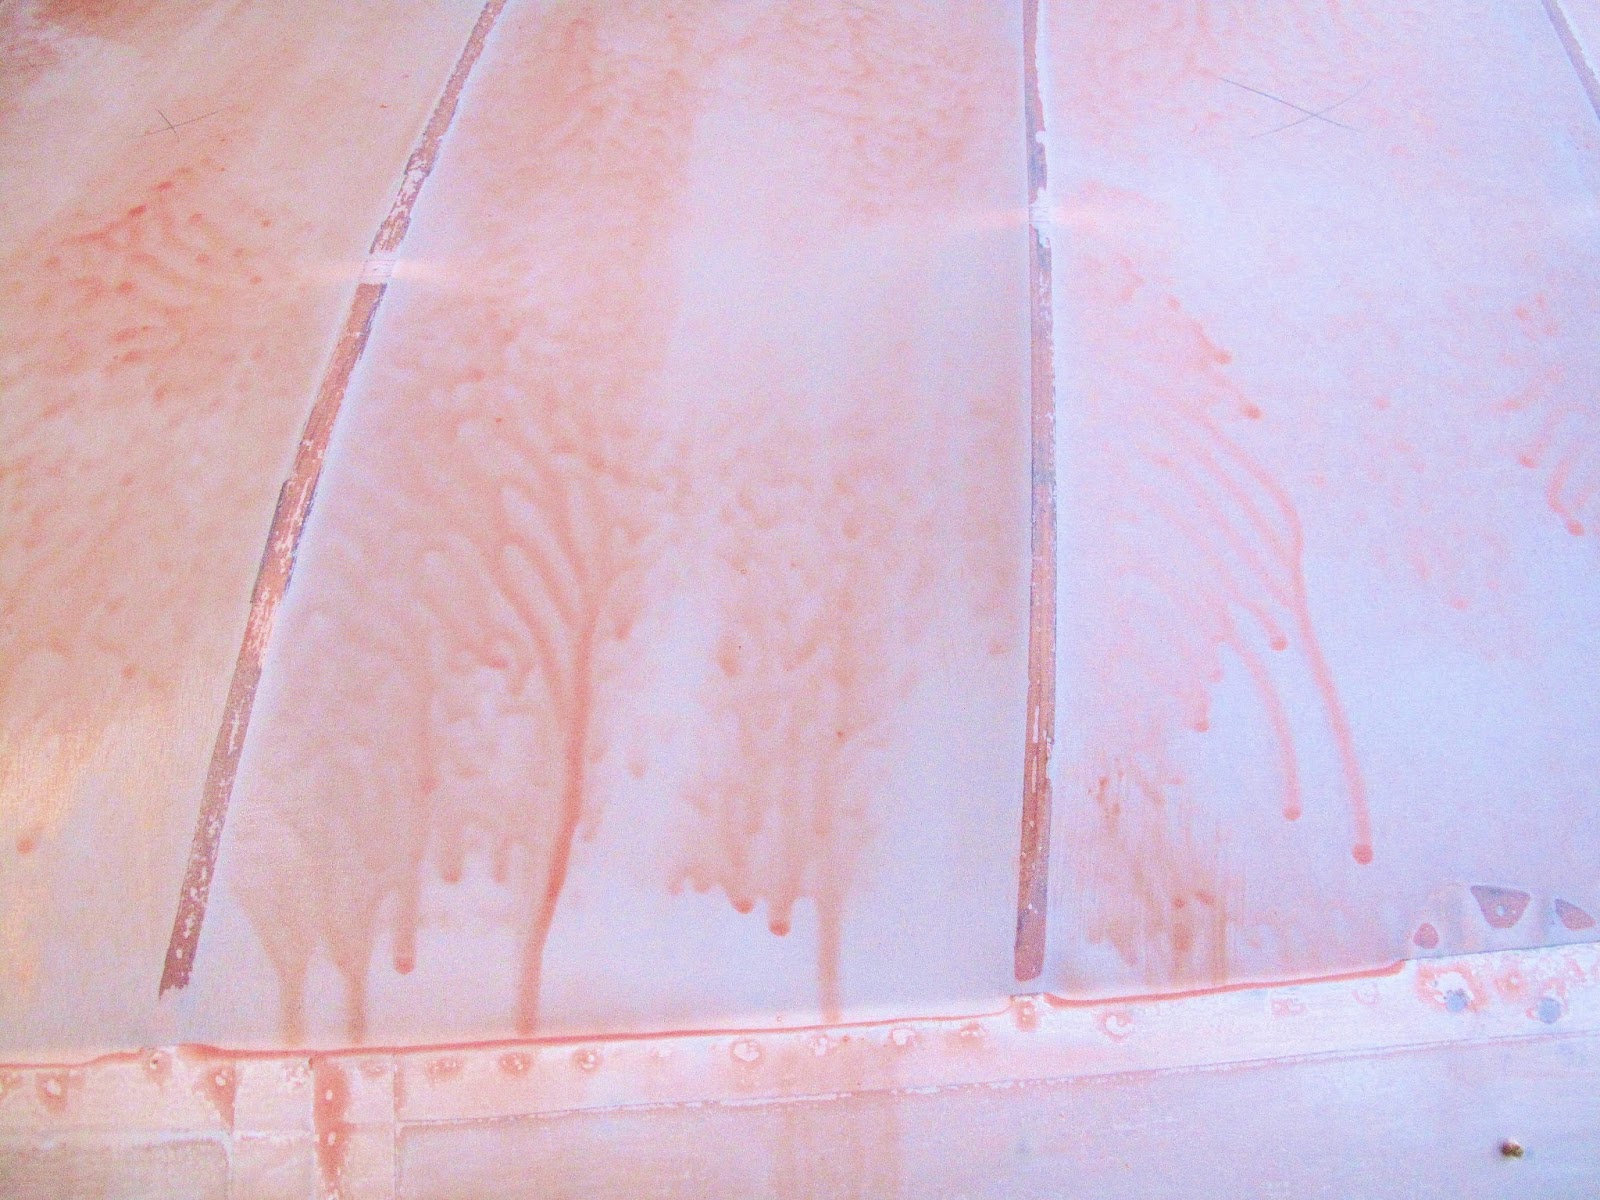

 With the left wing drying completely we're on to the right wing.

The lower fabric is pulled up and glued to the root rib.

 You can see the 2" cut better in this picture for the upper fabric.

All nicely glued on with Poly-Tak.

 You can see how loose it is in these pictures and the difference as you start shrinking it at 250 degrees.

My shrinking process is to move the iron in overlapping chord-wise lines on the first pass.  I work starting at the tip and root, then in toward the center one rib bay at a time, top and bottom.  I don't mark anything on the first pass because it's obvious where you've been.  On the second 250 degree pass I move the iron span-wise and work 2 rib bays at a time from the ends to center marking each bay with a check mark so I know what has been done.  The second pass is not so obvious as the first.

For the 350 degree shrinking I follow the same process but make a chord-wise line in the bay when the first shrink is done.  On the second pass I make a span-wise line to cross it.  It makes it real easy to tell what is done when you get interrupted or if like me your mind wanders a lot.  If in doubt do the bay again.  It will only get as tight as the temperature of the iron, no matter how long the iron sets or how many times you go over it.  A 2 pass method assures all fabric sees the important 350 degrees to tighten it properly.

Both panels have a coat of Poly-Brush and I'm ready to Rib Lace them.  They really look like wings now.  How cool is that?  I've got several day of cold weather coming so maybe I can get the rib lacing done and put tapes on when it warms up.

Saturday, November 12, 2016

Center Section Tapes Done


 The last tapes to be applied are the span-wise tapes.  They're last so if they come loose they will peel off and not stick around causing flight safety problems if they were stuck under the chord-wise tapes.  A coat of Poly Brush was brushed on all the tapes, feathering out the edges to not leave sharp lines.

The last thing to go on was the drain grommets, on the bottom of the wing, at the aft end of the ribs, and at the drain holes in the root box structures.

We're ready to start spraying the next poly coats.  I need to hook up my new compressor first.  The old, worn out, one puts too much oil in the hoses and onto whatever you're spraying.  First I'll get  started on the upper wing panels.  This is fun.

Tuesday, November 8, 2016

Chord-Wise Tapes On Center Section


 A nice afternoon for fabric work.  The glue is dry holding the inspection rings. A coat of Poly Brush covers the area for the doily and is allowed to dry before a wet coat is applied to bond the doily.

 After the doilies dry the chord-wise tapes can be applied.  I cut them long enough to wrap all the way around the ribs.

 To keep the off the floor I roll up the excess and put a spring clip on it.  Once you flip the wing over un-clip them one at a time as the tapes are applied.

 I'll let the chord-wise tapes dry and iron down the edges before doing the span-wise tapes.  That way there will be less bumps under the next layer.

With dope you sand down the edges of the tapes.  With Poly Fiber you just iron them down with a small iron.

Monday, November 7, 2016

Inspection Ring Doilies


 I glued the 2 inspection rings on the bottom of the center section.  I needed some round pieces of fabric, Doilies, to cover the rings to keep them secure.  The instructions say to make a frame, attach some light weight, uncertified, fabric, and iron it at 250 degrees.  You need it smooth so the doilies will be smooth when stuck on, over the rings, with Poly Brush.  I have a metal frame for our big embroidery machine which we have never had a use for.  It's about 48" x 26" and very strong.  I put some 1/2" wide double sided tape on the outside edge and stuck a piece of fabric to it.  It takes a while to shrink it with the 250 degree iron but all those wrinkles eventually came out.
 I removed the tape and used a gallon can lid for a pattern to cut the doilies.  The Fiskars cutter with a pinking blade works great for such things.  Just follow around the edge of the can while keeping the cutter square to the board.

 I was able to get 4 rows of doilies so I folded it into 4 layers and cut 4 at a time.  I ended up with 28 doilies which is all I need for all the wings.

By the time I was done I had lost my warm day so I'll have to apply these tomorrow.

Sunday, November 6, 2016

Center Section Rib Stitching (Lacing) Done

I like the hidden knot method of Rib Lacing (Stitching) which Poly Fiber recommends.  It's a pain to sand over the knots which normally set on top of the ribs.  You always sand through the tapes covering them. With Poly's hidden knots the knots are pulled inside the fabric along with the connecting cord, from stitch to stitch.  Poly Fiber likes calling it Rib Lacing instead of Rib Stitching.  It truth, when you sew, you form stitches around something, like the threads woven into fabric.  For Rib Stitching you form your stitches around the ribs.

A sewing machine locks each stitch so things don't pucker from loads put on the fabric.  On a wing we tie a Modified Seine Knot to lock each stitch so the fabric stays tight to the wings in flight.  It's not good if the fabric balloons up like a bad convertible top.

To do the Hidden Knot you need a curved tipped needle.  I lost mine again so I heated the tip of a straight needle and hammer it on the side of a socket wrench to bend it.  The bent tip lets you feed the needle under the fabric from stitch to stitch.

I'm using flat braided, waxed, cord to do the stitching.  It lays a little flatter than round cord, where it crosses the ribs.  After stitching you need to wipe the area around the stitches with Reducer to remove any wax scraped off the cord while doing the stitching.

It took 3 wet coats of Poly Brush to fill the Reinforcing Tapes after the stitching was done.  That's why they look so pink.  I decided to let the tapes dry well before putting on the finishing tapes and so I ran out of warm weather for today.

At least we're making progress.

Saturday, November 5, 2016

First Coat of Poly Brush on Center Section


 We are finally getting good weather for covering the wings.  Today I shrunk the fabric tight, wiped it down with MEK and brushed on the the first coat of Poly Brush.  It's starting to look like part of a wing.

Tomorrow, rib lacing, tapes, etc.

Thursday, November 3, 2016

Fabric Glued on Wing Center Section

I'm covering the wings with Poly Fiber.  I like it because it's easy to apply, less sensitive to humidity (I live in the south), and for a wooden airplane it's less flammable than dope.  I have found a problem with it.  It's easily stained from dirt, bird stuff, etc.  There is no way to remove stains if they happen.
 The process requires a cloths iron which will hold temperature to plus or minus 10 degrees F.  The iron needs to be calibrated at 225, 250 and 350 degrees.  To do it you need a thermometer, 1/2" stack of paper towel, and some heat sink to assure the thermometer senses the temperature of the iron correctly.
 The instructions call for an iron which will not shut off when setting still.  I don't think they make one anymore and my old one died.  The plan is you set the iron with the sweet spot on the thermometer bulb on the pad and mark the dial for the 3 settings.  Unfortunately the iron, which Aircraft Spruce sell shut's off after 30 seconds setting flat and 8 minute on the heel.  I strapped 2 irons together to hold the padding tight and tipped the iron flat every 5 minutes so it wouldn't shut off while I slowly adjusted the dial, let it heat up and then cool down to split the spread of high and low.  It took a few hours to get it marked for the 3 settings.  When it's heating there is a green light on the side of the handle.  If it turns red you've let it set still too long.  Tip it from vertical to horizontal and it comes back on.


 With the iron calibrated and the leading edge coated with 2 coats of Poly Brush, I cut a piece of fabric to wrap from trailing edge around to trailing edge.  Normally if you have fittings sticking up a couple inches in the middle of a wing you ignore them and cut the fabric after the first shrinking so the fabric can position itself.  The strut fittings at the root ribs are too big and in the wrong place to ignore.  I cut slits for them with a breakaway knife starting at the inboard corner and just big enough to clear the fittings.  I'll have to be more careful shrinking the fabric so it doesn't tear at the fittings.

I like the breakaway knives. when the blade gets slightly dull break it off and keep working.  They make the blades with this 60 degree point and with a pointier 30 degree point for getting in holes, etc.


 With the fittings poking through I started by gluing the fabric to the end ribs from the bottom side only.  Keep it loose.


 Next I fit it to the trailing edge cut out.  I had trouble with stretching it to fit the curve because I had the iron at 225 degrees.  It takes closer to 250 to stretch it.

I cut slits so I could stretch smaller sections.  With some work and the right temperature you can do this without slits.


 I did the cut out on the top and the stretched the top of the end ribs to fit.  It looks tighter in the picture than it is.  You don't need it tight.  It will shrink quite a bit.

I left it for the glue to dry before shrinking it.  When I went back out to work on it today it started raining so I'll wait for a dry day.