The Nicopress tool instruction sheet shows the cable eye end made with about 1/16" of cable sticking out of the sleeve. I figured out how to do it and we'll get into it later. As discussed earlier, my objective was to make these nice old thyme looking cable ends with a Nicopress sleeve and the cable end wire wrapped and soldered.
There are 2 ways to form the cable end. One is to use an AN 100 Thimble. The other is to use AN 111 Bushing. The bushing works fine where it is able to fit into the fork end of a turnbuckle. The Thimble works fine in a fitting or the eye end of a turnbuckle. The only time a Bushing is a better choice is under high loads. Under high loads the Thimble tends to flatten which causes the cable to lengthen which alters the rigged geometry of the plane. This does not happen with a bushing.
We used bushings, on the turnbuckle ends, for most of the rigging cables on the wings. They fit the turnbuckles we used, Army surplus. The problem I ran into was keeping the bushing at the end of the cable while forming the loop. Just bending the cable around the bushing doesn't form the correct radius so it tends to leave a gap at the end between the cable bend and the bushing. You can pull it tight on installation, but it affected trying to get the cable the correct length.
To solve this I decided to Pre-Form the bends on the cable end. They did this on old, WWI, brace wires made from piano wire.
I made a bending jig with some angle iron and dry cell battery terminal nuts. They are just the right radius and they have a groove which perfectly fit the cable. Being made of brass they do not scratch the cable.
There is one nut screwed to the base angle. I drilled out the threads on the one at the pivot for the bender. The pivot bolt is threaded into the base angle. Then there is one nut screwed to the pivot arm. I used nuts with 10-32 threads.
To form the eye we will make 3 bends, one around each nut.
I start with the pivot to the left and about 4"- 5" of cable sticking out past the first nut.
The line scribed on the base is the finished bend line for the first bend.
Hold the cable in position. With a block of wood, held tight to the first nut, bend the cable so it springs back to the bend line.
With the first bend positioned on the first nut and the cable end on the bend line, swing the arm all the way until it stops. This makes the second bend.
My first attempt at the third bend was to just pull the end of the cable back to form the bend. This makes a loose and poorly positioned bend.
What worked better was to hold the top of the cable, bend 2, tight to the top of the second nut.
Then use the block of wood to form the bend around the third nut just like the first bend.
Much better. The 2 cable ends form about a 90 degree angle between each other.
Now the sleeve and bushing can be assembled for crimping of the sleeve. I found the bushing didn't stay tight in the bend until the sleeve was crimped. You can hold it in position with the cable clamp or my pair of fluting pliers worked great. Just don't adjust them so tight you crimp the cable.
You just want to hold the cable snug to the bushing.
I clamped the pliers in the vise to hold everything while crimping the sleeve.
On 1/8" and larger cable always start with the center crimp then crimp the 2 ends.
It makes a nice strong cable terminal.
When using the Nicopress sleeve with a thimble, AC 43-13 recommends trimming off the pointy ends of the thimble. This allows the sleeve to fit closer to the bends at the end of the thimble. I trim off about 1/2 the pointy ends with the belt sander.
The cable end is held in the cable clamp and the sleeve positioned to leave about 1/16" of a gap from the thimble. You might say then why trim off the thimble? When all the crimps are made the gap will be gone because crimping makes the sleeve longer.
Crimp the middle then each ends.
To form the cable end like the Nicopress instructions showed, I started with a shorter free end.
Position everything in the cable clamp and mark the cut about 3/16" past the un-crimped sleeve.
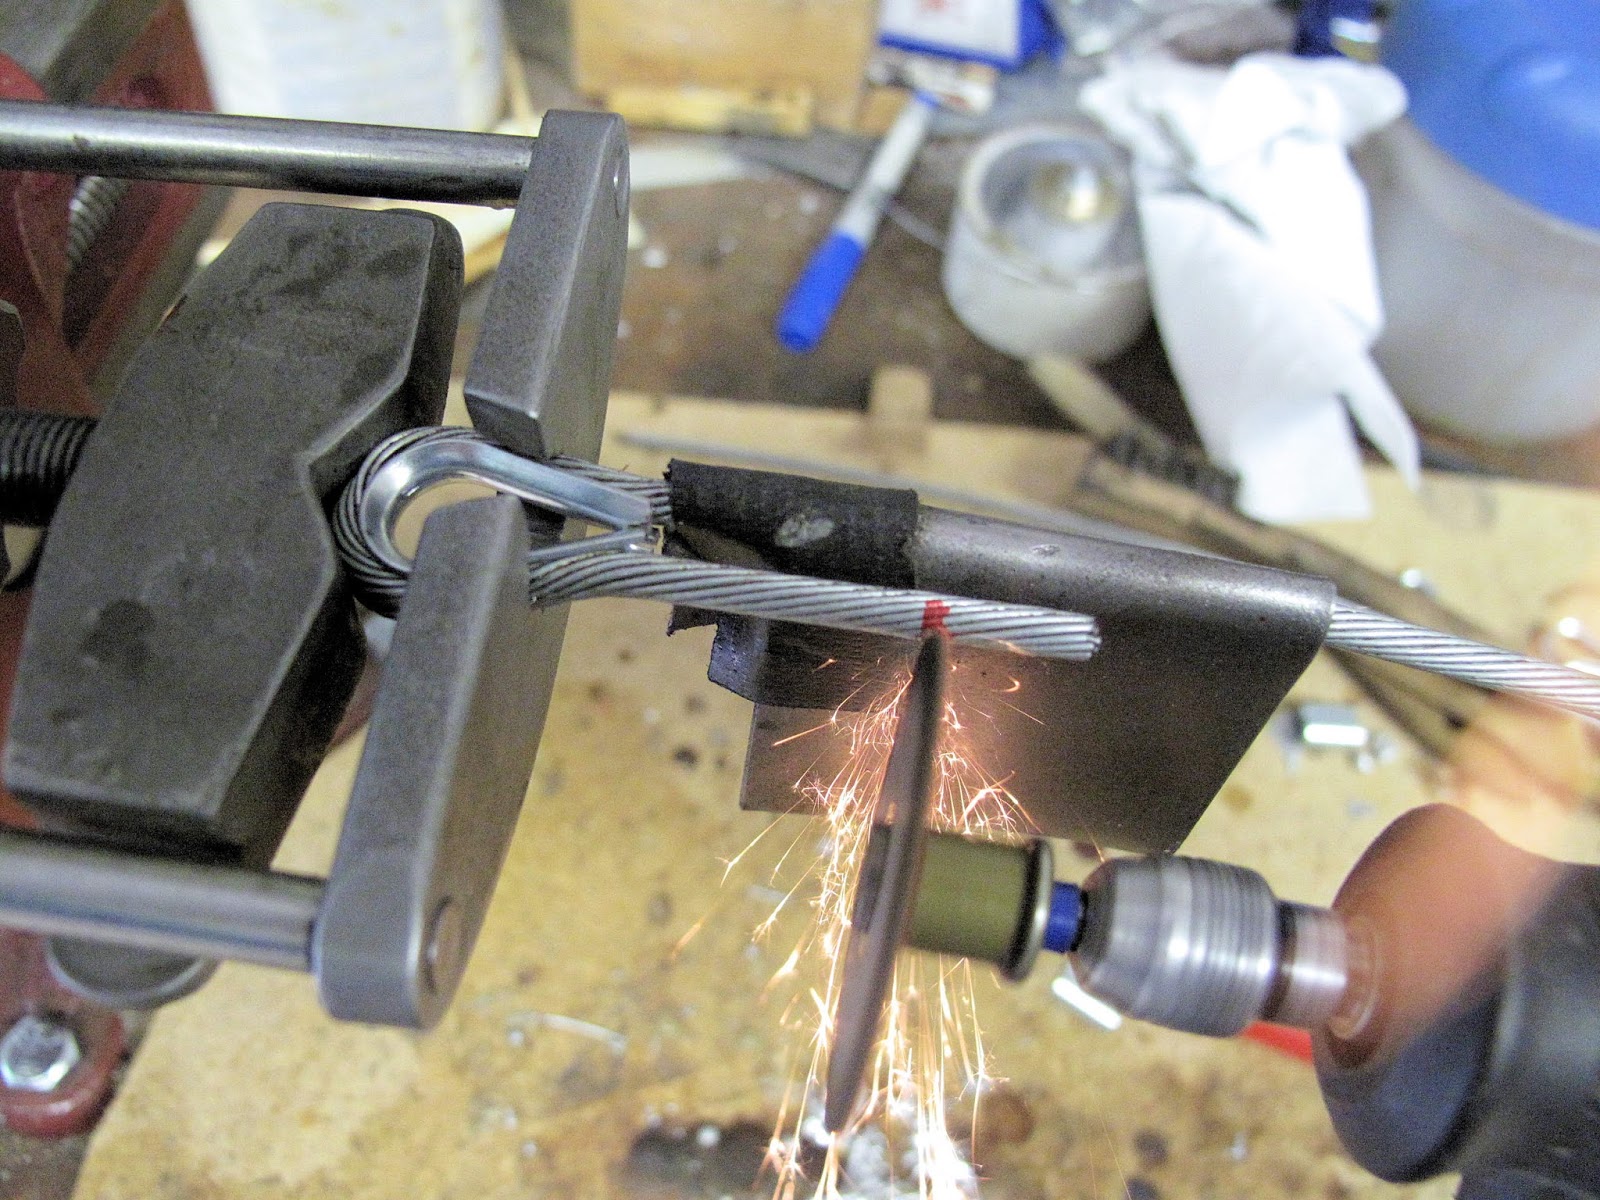
Protect the cable with 20 gauge steel and cut off the end of the cable.
Re-position the sleeve and crimp it.
The finished terminal leaves just a tiny bit of cable sticking out, as shown on the instructions. Instead of making the cut square, if the cut had been made at about a 15 degree angle, long ends closest to the main cable, there would be even less chance of getting snagged on the free end.
Back to our wire wrapped look. The cable end is in our cable clamp with the sleeve crimped.
The piece of PVC pipe provides a support for the cable while rotating. Otherwise it just flaps and you can't rotate it while wrapping the end.
CAM-18 recommends soldering the cable before cutting of the free end to length. I found it just as easy to cut before soldering. I don't think they had Dremel Tools back then. You still need to protect the cable. I used a short piece of steel for a guard but CAM-18 recommends a piece 3" long so you don't accidentally damage the cable.
You need a cut at about the angle of the twist in the cable so the wrap wire won't slide down the slope while wrapping the end.
I found it much easier to wrap if I pre-soldered the cable, where it will be wrapped. Then I clamped the cable and the free end tight together with a cloths pin and c-clamp.
This allowed me to heat the cable, with my soldering iron, and sweat them together. You need to let it set for several minutes to cool enough to remove the clamp.
Sweating them together holds them tight for wrapping and make the area stiffer for wrapping.
The wrap starts at the sleeve as shown in the earlier posting. and progresses to cover the free end completely plus about 1/4". The one thing I've learned since then is, it's easier to wrap rotating the cable so the top of the wrap is moving away from you. You can see the wire better as it's being placed so you can keep the winds tighter.
When soldering I found it worked better to start at the small, cable only, end and work toward the sleeve. Rotate the cable to be sure you've completely soldered all the way around the wrapping wire before moving along the joint. It's easier than trying to warm up an area to solder a spot that got missed.
When it's done you have a nice looking cable. All the wire should be soldered and the solder should fill the gap between the cables.
The cable ends with a turnbuckle were easy to wrap using the cable clamp to hold it while wrapping. The ends at the wing fitting required a slightly different method. The fittings are too big to fit in the clamp. I thought about designing a different cable clamp but found I could do them just fine without it. If I were doing the full wire wrap method I would need a different clamp to hold the cable tight while wrapping, but the Nicopress sleeves were installed in the fixture I built for controlling the length of the cable. The sleeve securely forms the loop end so all I needed was a way to hold the cable while wrapping the free end of the cable
The wing wires are all double wires. To rotate the cable while wrapping I just used 2 pieces of PVC pipe to hold the cables.
With a way to hold the cable the rest of the process is not much different. I cut the free end to length, tinned the cable with solder, and sweated the cables together as before.
I used the wing fitting as a kind of lever to hold while rotating the cable. Again, rotating the top of the wind away so I can see the wind develop.
The tube made a nice rest to hold the wound cable while soldering.
I found it convenient to wrap both cables a the fitting and then solder them.
I think I'm ready to make the tail surface brace cables for My WACO NINE project.