They finished the new runway a couple weeks ahead of schedule. It's flat end to end. You can almost read the numbers from the other end.

Hangars, looking west.
No more down hill to the north.


With the runway open I needed to finish my Condition (Annual) Inspection. Since it ran out during the closure I couldn't go flying to warm up the engine before checking the compression. I decided to check the engine compression cold, then recheck it after a flight. The compression check was my last task. All the valves looked good with the borescope and cylinders 1,3 and 4 all had good compression. Cylinder 2 had no compression. The leak is through the exhaust valve. The motor runs full rich, no mixture control, and I've had high cylinder head temps, so carbon buildup on the valve stem and guide was suspected.

Cylinder 2 Exhaust


Cylinder 4 Exhaust


Then, with the piston at bottom, I used a brass rod to gently tap the valve into the chamber.
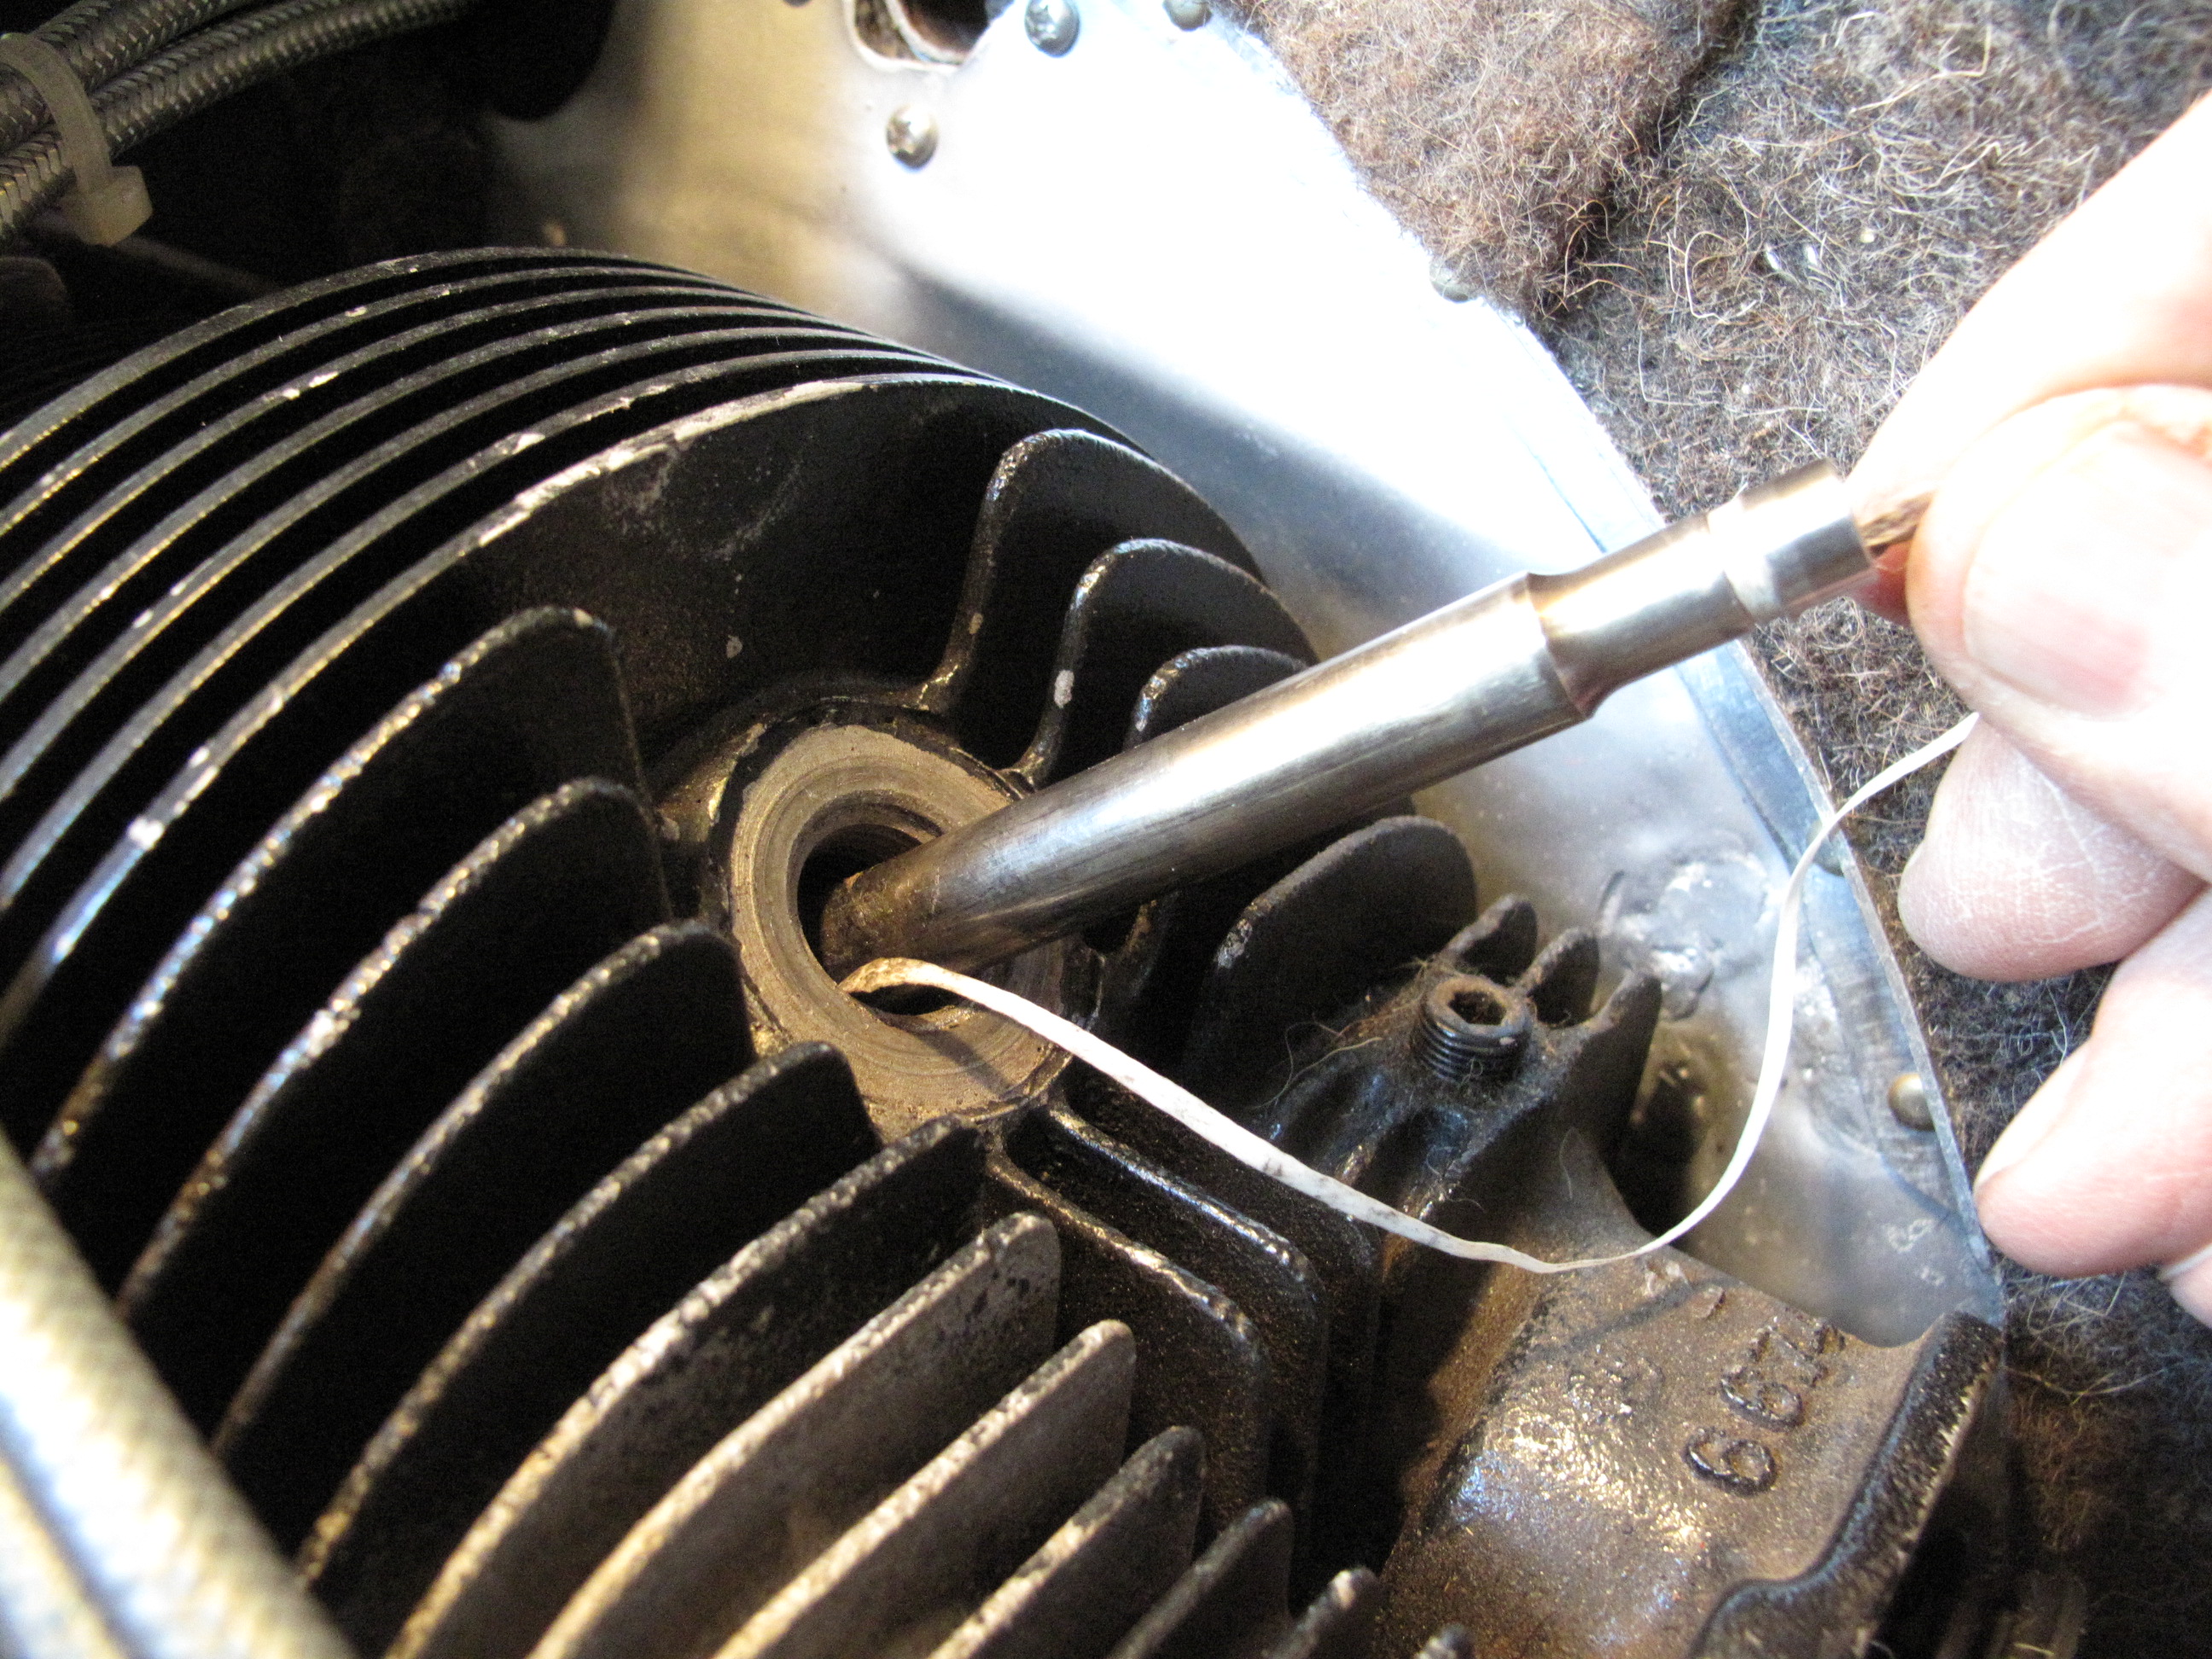
I used a piece of safety wire to fish out the cord and move the end of the valve stem to the spark plug hole.


 There is some soot build up on the lower end so I cleaned it up and polished it with crocus cloth.


I used a round wire brush to clean the valve guide.
 The valve stem and guide were oiled and the cord was then used to pull the valve stem back through the guide. I used a curved end rib stitch needle to lift the valve end to get it aligned with the guide.

The rope was used to hold the valve while I compressed the springs to put the springs back together.
I should have checked the compression first. It's better but I still have a leak through the valve. After some experimenting, I've decided to remove the cylinder and replace the valve. I've ordered parts from Fresno Air Parts. They should be here in a couple days.
I have removed the grills from the Nose Cowl so when this is back together we'll see if that helps the temperature problem.

