One of the things needed to safely have cabin heat is a fireproof valve to turn the heat on or off and which will prevent flames getting into the cockpit if there is an engine fire. The valve box gets mounted on the engine side of the firewall. I'm using 20 gauge (0.035") 1018 steel to make the box because I have lots of scrap from making Curtiss OX-5 Exhaust Manifolds and elevator horns for the WACO NINE. I made the box from one piece of steel with the sides welded together. The holes are where the inlet and outlet tubes connect to the top and bottom of the box. When the heat is off the hot air from the exhaust heat muff passes through the box and out the bottom of the engine cowl. The tabs sticking up here are the corner flanges which will get welded to the sides when the box is folded.
The rings were made from strips of steel formed around a socket wrench and spot welded together. I had to buy a cheap spot welder to make the exhaust manifolds. It has been a useful tool.
If you look at the first picture I left about 1 metal thickness sticking up to use for the corner weld. The corner is just melted together with the torch.
Before folding the weld scale was grit blasted off. The tabs sticking up are the mounting flanges for the top and bottom of the box. We'll form the other 2 mounting flanges after the box is folded. I want all 4 flanges in a plane. I'm good but not good enough to make all these bends and have the flanges actually line up.
The first bend was made over an oak form block with a small bend radius and a few degree spring back angle so the bend could be made square. The piece of plywood is a backing block. It's needed so the box wall will stay flat and the bend will be tight to the block.
The same process was used for the second bend. We now have 2 sides of the box folded.
A form block was made to set in the box while forming up each end. The top and bottom, sides with tubes had the mounting flange and corner tabs formed before welding on the tubes.
The first 2 sides prevent over bending the top and bottom enough to get them to spring back to a square bend. As a result they need to be held tight with clamps while spot welding the corner tabs.
A couple welds were made near the open end of the box.
The clamps were then removed and more welds added to each corner tab.
Now we need to form the last 2 mounting tabs so they all set tight to the firewall.
The form block was clamped to the side using the thickness of my thin steel scale (ruler) as a gauge to offset the block for the thickness of the flange.
The tab could then be hammed to 90 degrees and the mounting surface aligns with the top and bottom mounting flanges.
I always hammer metal using a block of hardwood, not shown, so the metal being hammered over won't get dented from the concentrated blows of the hammer.
We need a stop for the flapper valve so when it's open it can't get stuck. This hat shaped piece gets welded into the front of the box.
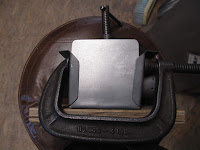
With the basic box formed I clamped it to a piece of 3/4" plywood to hold it flat while I welded the corners shut. It might not have warped but this seemed an easy precaution.
A steel hinge was welded into the box and the the valve (door) welded to the hinge. A spot welder made all this so easy.
The closed (heat off) position.
When it's in the on position the valve sets tight to the stop and very little hot air will leak around the valve.
The eye bolt is to attach the control to operate the valve.
The box needs to be painted and the outlet tube riveted on.
We'll come back to this when I hook up the control to operate it.


No comments:
Post a Comment