We're working on the 2 baffles in front of the cylinders. They each have the front piece you can see, which directs air from the cowl openings up to the cylinders. There is a piece riveted to each of these which is formed to fit the bottom front of the cylinder to force air to flow around the front cylinder cooling fins. I'll reuse the formed pieces and remake the front pieces. There is also an air intake tube on each which I will reuse, one for carburetor heat and a smaller one for cabin heat.
To make each front baffle piece I made 3 patterns to form the complete pattern. The first is for the inboard flange which goes from the baffle out to the nose cowl. I drew the location of each on the inside of the nose cowl and then copied the curve to a piece of heavy card stock.
Because the profile contour gauge sets up from the card stock I use a square to help transfer the line to the card. It takes a couple passes with some overlap to draw the full curve.
The pattern was cut and a line cut on the back which lines up with the back of the nose cowl.
The pattern was trimmed to fit the crank case with the nose cowl in place. I've removed the cowl for the picture.
The same process was done for the right side and the patterns clecoed in place.
The next pieces were the bottom flange.
This is the piece which fits the cylinder to direct the air through the fins. The original support rod will be used at the cylinder base but not at the head. You can also see the crankcase breather outlet fitting in the upper right corner of the picture. We'll come back to that later because we need a hole in the baffle for the breather tube.
The pattern for the main front piece was made form the original damaged part. It's starting to look like a baffle.
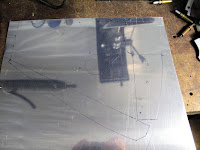
The 3 pieces were then used to layout the blank piece on aluminum sheet.
The blank was cut and formed to make the new baffle.
The same process was done for the other side.
With the nose cowl installed (removed for the pictures) a piece of soft wood was used to burnish a cut line 1/4" from the cowl to allow clearance for movement. The gaps will get sealed with felt seals.
The right hand baffle riveted and ready to install.
The finished left hand baffle.
The next step is the crank case baffles.


No comments:
Post a Comment