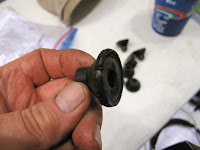
The gasket set, from Fresno Airparts Co., included new engine mount rubber cones, so I decided to replace the old ones. This was much easier to do with the weight of the cylinder off the engine.
I suspended the engine with a ratchet strap so it would not accidentally fall and ruin things. I snugged it tight but didn't use it to move the engine like I did with the come along in the attic. I loosened all the nuts leaving them so a few threads held them on. This gave some wiggle room for removing the old rubbers. I did the upper 2 mounts first. The bolts were driven almost out with wood blocks. Then the engine was tipped down just enough to get the back rubbers out and the new ones on the ends of the bolts.
To get the lower ones out the nuts were put back on the new top mounts and the engine lifted slightly at the prop shaft.
The bolts are a tight fit in the rubbers so I used a large C-clamp to push the bolt through the rear rubber. It was a little awkward but it worked fine. I used a hardwood block to protect the engine mount casting. The bolt stops at the block but a quick tap with a plastic mallet finished pushing it forward.
Make sure to clean the bolt threads so the nuts will tighten to the proper torque. Mine had oil and old rubber in the threads.
A rubber mallet pushed the front rubber onto the bolt far enough to get the nut started.
The engine book says the nuts should be tightened between 60 and 80 inch pounds. I used 70 Inch pounds so I could adjust the nut slightly, either way, to align the cotter pin hole.
The old ones were in various states from very good to this badly cracked one. Definitely worth a couple hours work and good fun. Just like real airplane mechanic work. Oh Yeah, I am a mechanic.
Subscribe to:
Post Comments (Atom)


No comments:
Post a Comment