Our old cockpit cover was just that, it covered the windshield and cockpit opening. I wanted a cover which would include the engine, and cover the gas cap. We had gotten rain in the gas tank and I had a bird get into the air inlet on the cowl. It seemed easy enough to prevent both of these.
This new cover is made in 2 pieces. It splits at the Firewall, just in front of the Cabane Struts. The 2 halves are joined with Velcro. The aft section laps over the nose section. I put the loop half of the Velcro on the bottom of the aft section. That way if I only install the aft section, like when it's in a bird free hangar, the Velcro shouldn't scratch the paint as easily.
I made my pattern with a cheap blue tarp, I new they were good for something. Seams were taped together with 2" masking tape and the pieces were taped to the plane with Blue Painters Tape so I wouldn't peal up any paint.
I didn't worry that the seams in my blue pieces had to be exactly where I wanted them on the actual pieces. I drew where I wanted to cut the pattern with a felt marker. If you have a small gap in the pattern use masking tape on both side to fill the gap. That way the tape doesn't stick to the plane.
You need to add pleats, little folds, to form the cover to the the curves of the nose cowl, etc. Mark them with a felt marker than tape them in place. Later when I flattened the pattern pieces I carefully cut the tape to unfold the pleats. Much easier than removing the tape.
I used a piece of webbing folded near the center to hold the nose cover around the Air Box outlet tube. The strap is sewn to the right hand panel and Velcro holds it to the left. The right panel overlaps the left with Velcro to join them.
The pattern fits nicely. After I took these picture I taped on pieces of webbing which wrap around under the plane to hold the cover down. This allowed me to work out the length of the straps and where I wanted Velcro.
At home the pattern was cut apart and flattened. I arranged the pieces on my cover fabric. I've used a boat cover material called
Surlast from
Sailrite in Columbia City, Indiana. They're in northern Indiana, nowhere near water. We've been buying from them since our hang glider days in the early 70's. It's do it yourself heaven.
The pieces were cut out leaving as much space as possible for seams and hems.
Each pattern piece was then drawn on the back of the panel with a felt marker. You might have to use pencil on light colored fabric.
A 5/8" edge was then added for seams and hems. By making them all the same it makes it easier when aligning panels for sewing.
I used
Seamstick basting tape to hold all the seams for sewing. It doesn't have a strong grip, but it works. They have a much stronger 3M version for twice the price. I have a
walking presser foot sewing machine, which I love. By using basting tape you can do this just fine with a cheap sewing machine, which I did for years. You will need a #110 needle to sew the
heavier thread.
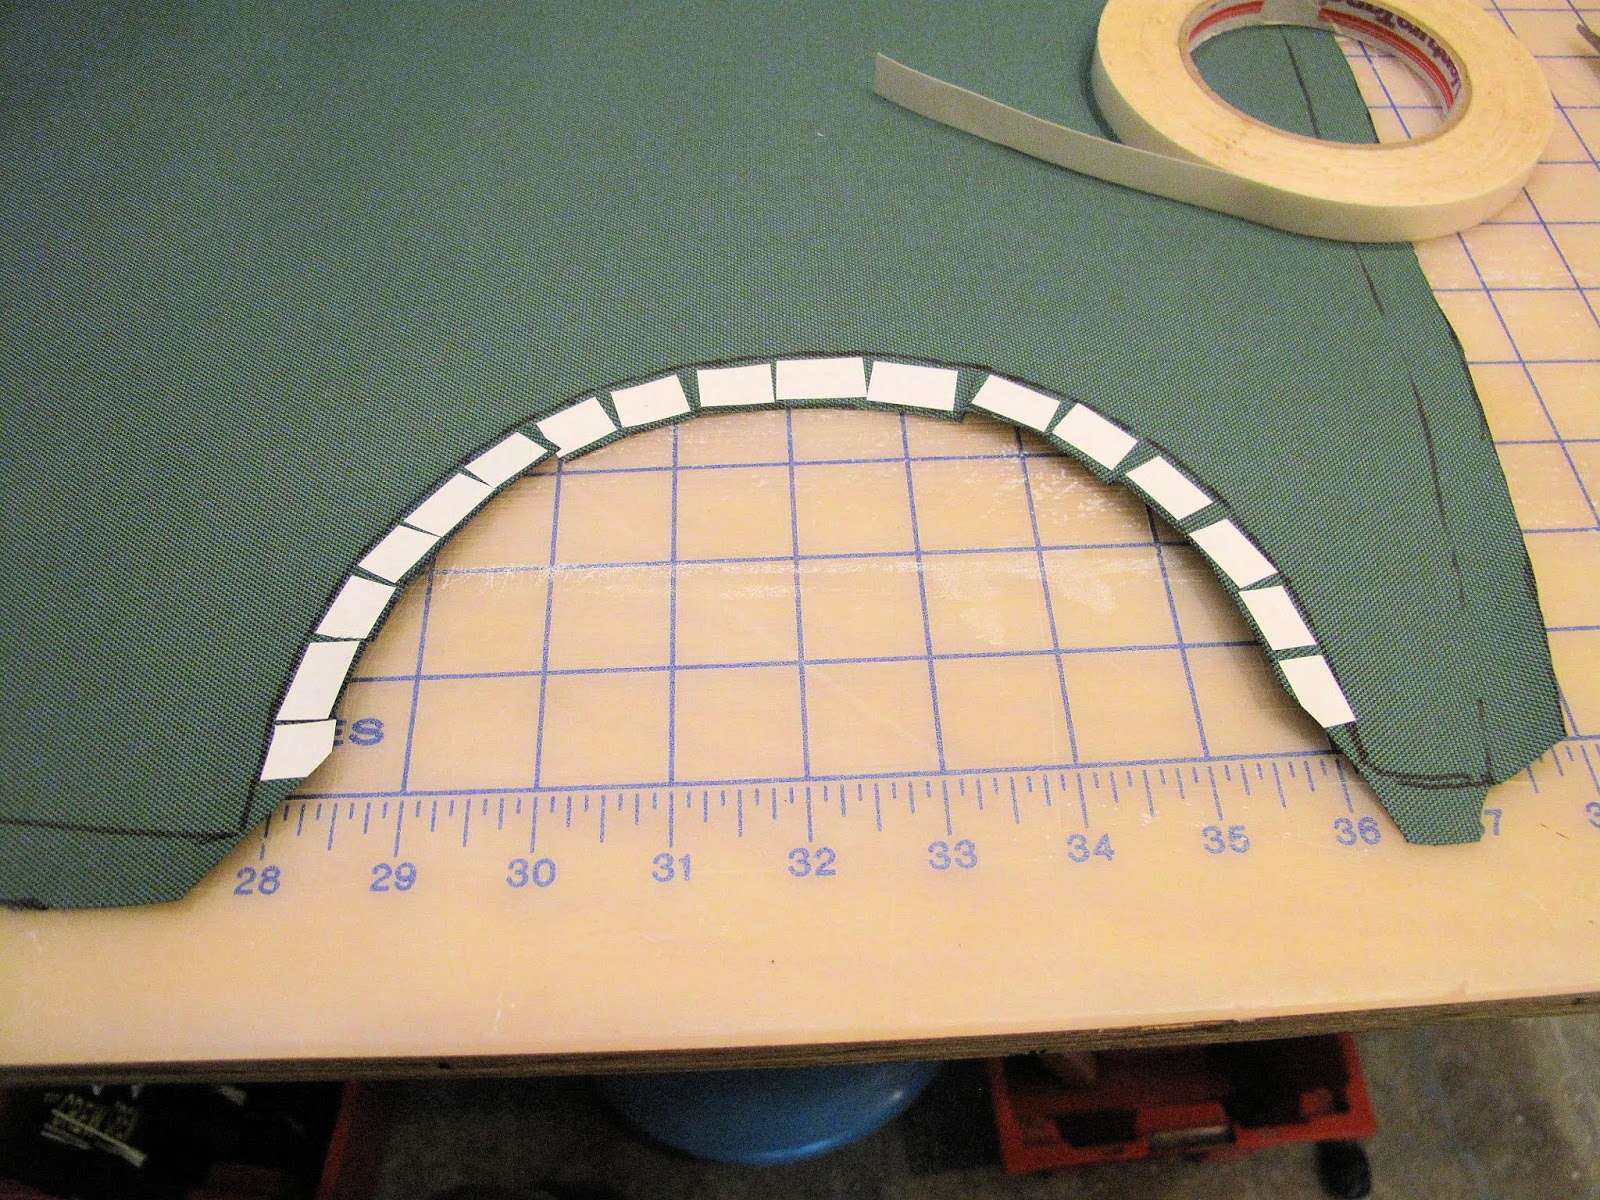
For this curved section I used a lot of little pieces of tape to hold all the tabs for sewing.
When sewing the cover I sewed pleats first, then anything which was easier sewn on a small panel before I sewed panels together.
There are few wrinkles. You can easily rip out a seam and fix wrinkles or ignore them as I did with this one on the nose.
The cutout for the prop started round but the pull of the fabric made it oval.
The wrinkle on this corner of the cowl left the outside edge loose so I ripped out the seam and moved it to pull the corner tight.
The straps, 1-1/2" polypropylene, are sewn on one side of the cover and attach with Velcro to the right side. The straps are both on the main rear piece in case the front piece is not installed. Sailrite has 2" webbing but we use the 1-1/2" for our
airline baggage tags, so I had it available.
To get around the forward struts there is a split which closes when the panels are stuck together.
To reduce water under the cover at each strut there is a little dam turned up above the strut opening, to direct water around the strut.
To get the cover around the aft struts there is a slit which closes with Velcro. I added a little tab of webbing between the cover and the hook Velcro to make opening the joint easier.
I made the sides straight along the bottom edge. To hold the middle of that edge down better I added a snap at the bottom of the windshield frame. I could have made that side edges with a (catenary) curve but it would have made the panels bigger and used more fabric.
I placed the snap on the lowest screw hole for the glass retainers. I had planned to use the last hole in the cowl panel but I used #8 nut plates inside and the snaps only fit a #6 screw head.
I reinforced the snap with a piece of webbing.
I did add a cover over the gas cap. It has 8 pleats and is sewn on top of the cover to shed water better.
I used more snaps at the aft end to fit around the dented headrest, as we did on the last cover. The dent is from when I fell off the wing and added the hand holds, I'll fix it.
Some day when I'm bored, with nothing to do I'll fix the remaining wrinkles. Until then it works as I wanted so I'm delighted, wrinkles and all.


No comments:
Post a Comment