Wednesday, February 3, 2016
1991 - 1992 Engine Overhaul
In 1992 I was able to move the plane into an old open hangar. Howard Anderson kept his Luscombe in the front of the hangar and Fly Baby hid out in the back.
Before starting on the engine a good wash was overdue. It also makes working on the engine easier if it's first washed down with degreaser and well dried.
The first task was to disassemble the engine and clean all the parts for inspection and careful measurement.
Despite my measurement experience I've learned that when you send parts out you should expect everything that can be done to be needed. Ask the full price and maybe you'll be pleasantly surprised if something isn't needed.
One major problem I found when I tore it down was that someone had installed the thrust bearings incorrectly. One half of the circle has a pin to prevent them rotating. Someone used 2 halves without the pin. They had both spun and worn until they were overlapping so you could not feel any wear. In the future I'll be more suspicious of other peoples work.
I sent the components requiring work to different shops to see if there was a difference which might help me decided who I would use again. The crankcase went to Divco, Inc. in Oklahoma. The crankshaft, camshaft, rod, pins and rockers went to Engine Components in Texas.
The cylinders were more work to pack carefully but I got all 4 into a U-haul book box. They went to El Reno Aviation in Oklahoma.
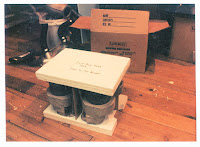
All did good work, but I was most impressed with the information ECI provided on the measurements of the parts they worked on. I really wanted to know if parts were at maximum material condition or only barely serviceable.
With all the parts back to serviceable condition it was time to paint everything. I dislike Continental Gold so the older look of grey and black was an easy decision.
All the assembly work was inspected by my IA so the engine would be usable on a certified plane if I ever needed, not likely. Even being an A and P and doing most of the work myself I still spent $4,500 on the overhaul. That may sound cheap but we built the whole plane originally for $1,700 in 1966.
With the basic engine back together all the baffles and accessories needed to be reinstalled. The carburetor was inspected and repaired as needed along with a steel needle valve to handle autogas and 100 LL.
New extensions were welded to the exhaust pipes and some minor repairs to the carb. heat muff.
The propeller had been inspected and repainted the prior year by H and H Propeller Service. They also re-plated the hub.
We had clamped the brake lines to the struts. You could see where water was getting in around the screw holes so I removed them, sealed the holes and wrapped the lines to the struts with varnished cotton cord. It works much better and gives a nice WWI look.
After the recommended ground runs, the plane was flown again on 24 Oct 1992. An hour over the airport at full throttle made me realize that a person is probably better off not breaking in an engine on the test flight of a new homebuilt. With a fresh engine I was able to keep flying right through the winter.
Subscribe to:
Post Comments (Atom)


No comments:
Post a Comment