I've always thought the ailerons on the Biplane Fly Baby were slightly inadequate. I've run out of aileron trying to hold the wing down on crosswind landings and had to go around. The wings on the Bi-Baby are shorter so the ailerons are a little less effective. We've never had gap fillers between the 5 sections of piano hinge, which I'm sure contributes a little more to the problem, by letting air flow through from the bottom of the wing.
I've thought about ways to add gap fillers which are simple and easily replaced if needed. The idea I settled on is to use strips of clear vinyl, taped to the wing and the aileron, and held secure by the hinges.
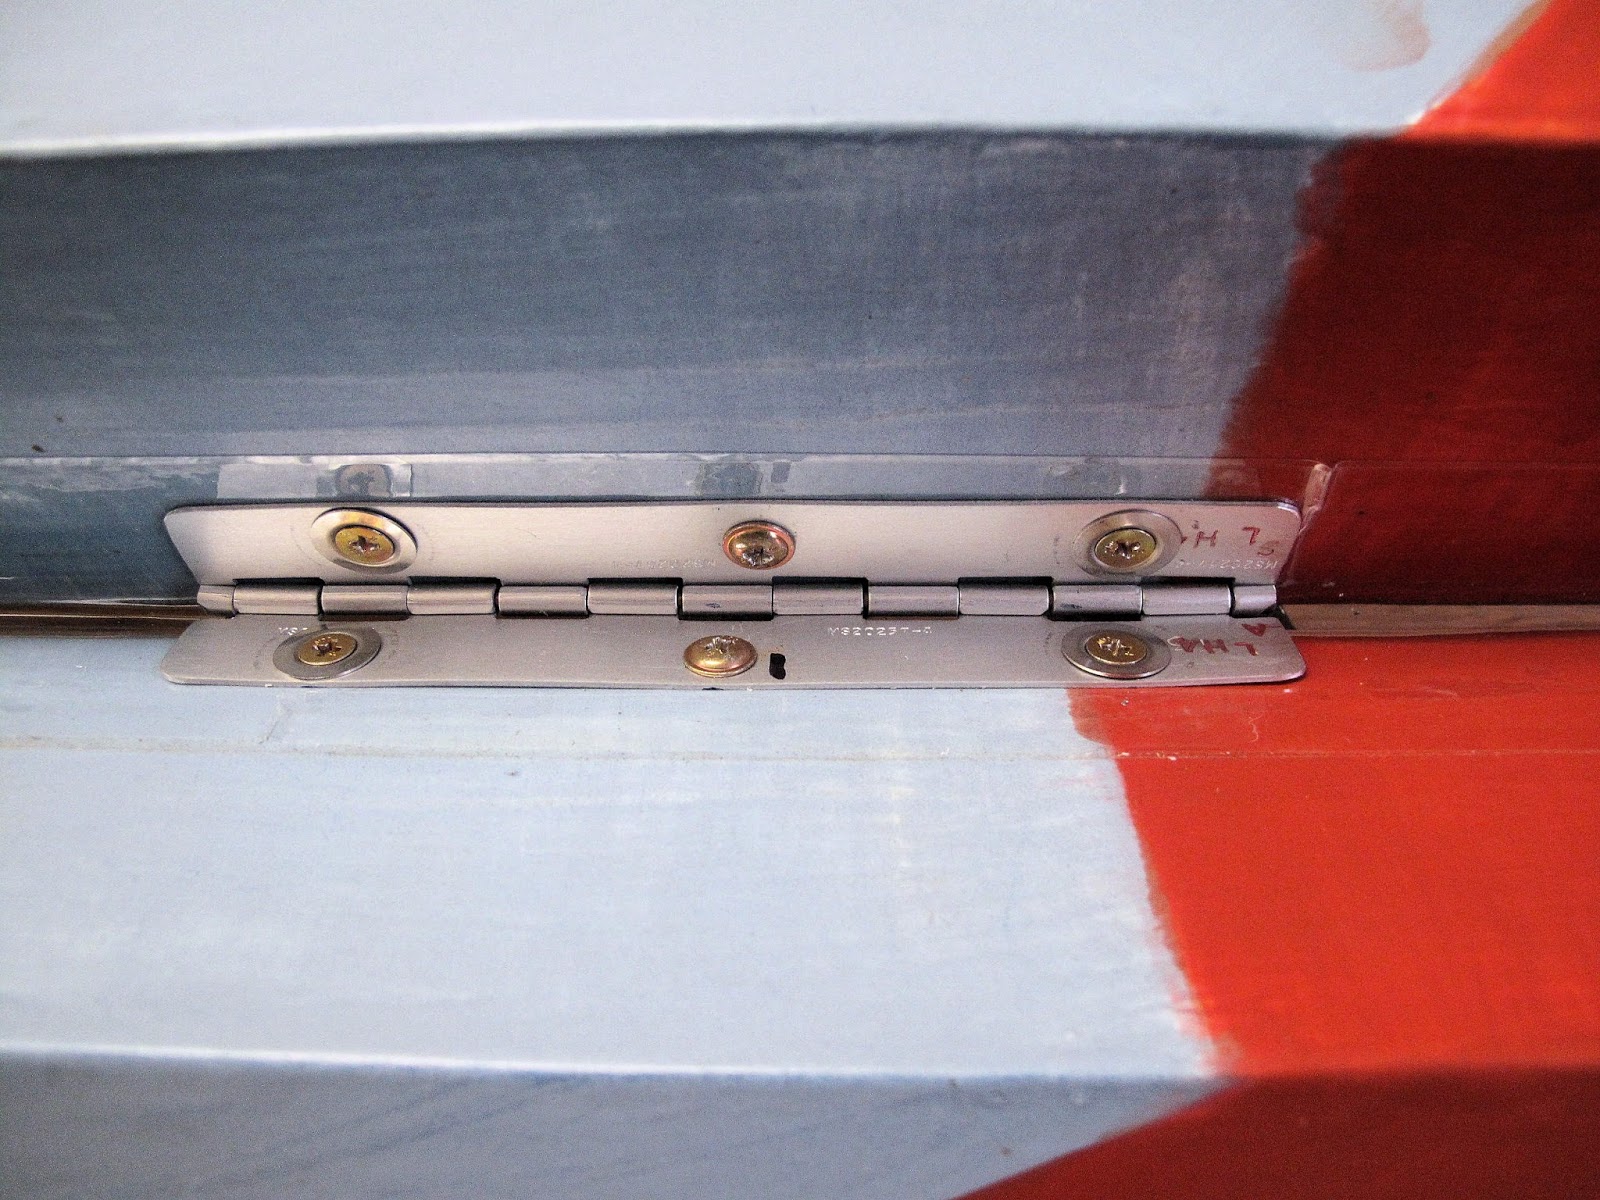
My first plan was to cut strips of vinyl 2 3/8" wide with 1" double sided tape along each edge. When I went to install them I realized I needed a bigger, 5/8", gap at the moving part of the hinge because of where the tape actual touches the fabric.
I cut out the screw holes in the fabric before installing the tape, to make it easier cutting the holes in the tape.
The tape was applied to the aileron first. It seemed to make installing the aileron easier. I realized I needed to hold the wing side of the vinyl strip to the hinges to keep from wrinkling it. I used a strip of 1/2" wide double sided tape to hold it to the hinges. The vinyl was taped to the hinges with the hinges folded closed.
The screw holes were cut through the vinyl and tape before installing to the wing so the screws could be easily positioned.
I played with the idea of slowly removing the paper backing as I installed the aileron. That didn't work. The better idea was to remove it all and install the aileron starting at one end.
I used washer head screws to give a good bearing area with a thin screw head. I put the screws in the first hinge and pushed them into the wing holes while keeping the other end of the aileron a couple inches out so the tape wouldn't get stuck in the wrong place.
I worked one hinge at a time installing the screws until they just engaged the nut plates, then on to the next hinge. As each hinge was added I tightened the screws on the earlier hinges, a little, to slowly pull the tape and aileron to the wing.
It worked out well with a nice even gap filler. Once the tape was in place I used a squeegee to make sure the tape was tightly adhered.
A fairly simple gap filler. We'll see how it works in flight.
While installing the gap filler on the left wing I realized there was a problem with some of the screw heads hitting each other. This prevents the aileron from having full down deflection and puts a strain on the hinges. Some of the screws should have had more offset so the heads would miss each other. The Right wing screws were all well spaced, Some learning must have happened with the left wing. To get more travel I replaced the offending screws with flat head screws and stainless steel countersunk washers. I had to take the hinges back off and countersink the screw holes. The washers assure the crews will not pull through the hinge and add a little better clamping force.


I also found that the right hand aileron was positioned 1/8" high relative to the wing. I have no idea how I missed this when I made the new hinges. The only practical solution was to make new hinges moving the holes on the aileron side down 1/8". The hinges were well positioned on the wing side so there wasn't any benefit to moving them. The original hinge holes were easily made with the fabric off the wings. This fix had to be done without getting into the wing or aileron.
I decided to only make new Aileron halves so I wouldn't accidentally mess up the holes on the wing side. The wing side pieces were crimped on the ends to trap the hinge wire.
To get the wire out I rounded the end of a 3/32" pin punch and used it to remove the crimp on the ends. Then the pin could be driven out.
With the pieces separated the trick was how to move the holes down 1/8" on the aileron piece without accidentally moving any of them in another direction.
I used the belt sander ground the loops of the old hinge piece thin enough to break them off. I didn't want to accidentally grind off too much since the plan was to use the remaining ends of the loops as stops to position the piece as a pattern for punching the new holes.
Using needle nose pliers I rolled the old loops to break them off.
I then used the belt sander to carefully grind the loop ends to a perfect length. It took a few passes at the sander to get them just right.
I clamped the old piece on the the new one and then measure the offset, and reground the ends until I got the offset to 1/8" +- .002".
With the old part clamped on as a pattern, the screw holes were punched in the new piece. Each hinge was reassembled and reinstalled. The aileron now fits perfectly.


No comments:
Post a Comment