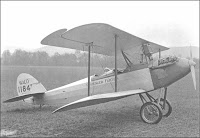
The motor cowl on my WACO NINE is latched with 2 leather belts. The plane is basically WWI construction so it seemed like a good idea for the Fly Baby.
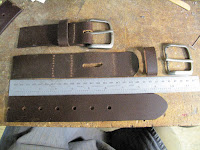
We found some Dickies leather belts on line for less than $5 each and ordered 4 of them. The buckle Frame was held to the belt with some screwed on clips so I undid all that and sewed the frame to the belt in the normal way.
I figured out a good length for the belts and cut them into pieces. I made the cuts to use the end with the adjustment holes, and cut of the other end to use one set of the stitching holes where the buckle end was sewn together. It saved me creating some of the needed holes.
The next step was to create a slot for the Prong to move in. The way the belts were originally made the prong and frame were not sewn into the belt loop. Once I figured out the length of the slot I Punched holes in each end and cut the slot with a small utility knife.
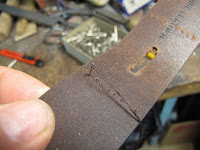
To make the frame loop I needed needle holes to stitch the loop together. I folded the end and used heavy duty pins to poke holes from the old holes into the fresh half. I left the pins in as I worked to keep the holes aligned.
I started the stitching from the inside of the fold, installed the buckle frame and pinned it back together.
I found a spring clamp helped hold the leather tight while I hand stitched the seam. As you stitch you pull out each pin.
The second row of stitching was placed to give room for the retaining loop between the 2 rows of stitching.
WACO made folded aluminum clips to go over the cut end of the belt to help secure them to the cowl. I decided to use 3 screw holes. I punched 3/16" holes in one end of the clip blanks.
To get the fold bend square I made a piece I could cleco to each clip as a guide while clamping each piece in the sheet metal pliers.
You clamp the assembly tightly in the pliers and remove the clecos, you're ready to bend.
I have a nice smooth radius filed on one side of my pliers for making bends. You can only bend to about 150 degrees.
To finish the bend I used a drill bit shank and clamped the piece in the vise. You need the top of the jaws just below the centerline of the drill to get a tight bend.
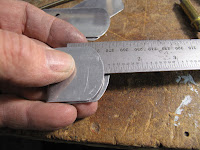
I guessed at the distance from the screw holes to the edge of the pliers for the first piece. After folding it I measured the offset and shortened my gauge by half the offset.
It makes nice folded clips.
The holes in the backside were center punched with a duplicating punch and then drilled with a center drill. The center drill won't cut into the sides of the hole in the first side.
I made my clips so I could use one of the existing adjuster holes.
With the clip held in place the holes can be scribed on the finished side of the belt.
It was easy to locate the punch to add the remaining holes.
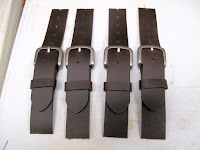
They are starting to look quite industrial.
To help prevent cracks I'll rivet some reinforcing plates to the inside of the cowl panels.
I started with the belts installed so the loose end pointed down believing it would stay buckled better. I found it was harder to fasten them so I think in the end I'll install them with the end pointing up. This is very stiff leather.









No comments:
Post a Comment